Tuesday, September 29, 2020

Not 2 Shabby Critter Costume Party - Card 2

Oh, hi! I've got another card using the super cute bee from the Critter Costume Party stamp set by Not 2 Shabby! And this one is an interactive card featuring Whimsy Stamps' Kinetic Dies.


{Supplies used are linked in the text in this post. Compensated affiliate links may be used at no additional cost to you. Thank you for your support!}


You can see how the card came together in the video. . . as well as a list of supplies used and the Copics Markers used.

Thanks for stopping by today!

Thursday, September 24, 2020

Not 2 Shabby Shop Critter Costume Party

Oh, hi! Is there anything better than a bunch of critters dressed up for Halloween?!? I don't think there is. . .especially when they are as cute at these guys from the Critter Costume Party stamp set by Not 2 Shabby!


{Supplies used are linked in the text in this post. Compensated affiliate links may be used at no additional cost to you. Thank you for your support!}

I started out by doing some ink blending to create my night sky and then stamped and colored the images.  You can see how the card came together in the video. . . as well as a list of supplies used and the Copics Markers used.

Thanks for stopping by today!

Tuesday, September 22, 2020

Eye Scream! You Scream! We All Scream . . .

 Oh, hi! I'm over on the Whimsy Stamps YouTube Channel today sharing one of my favorite techniques: Reverse Masking.  I also share tips on how to create multiple masks if you don't have a Brother Scan n Cut Machine.

{Supplies used are linked in the text in this post. Compensated affiliate links may be used at no additional cost to you. Thank you for your support!}

You can see how it all came together the video.

Products Used:

Whimsy Stamps Eye Scream Stamp Set

Whimsy Stamps Honey Drips Stencil

Whimsy Stamps Wonky Stitched Rectangle Dies

Versafine Onyx Black Ink

Memento Tuxedo Black Ink

Twisted Citron Distress Oxide Ink

Lucky Clover Distress Oxide Ink

VersaMark Ink

Neenah Classic Crest Cardstock

Cougar Super Smooth Cardstock

Black Licorice Cardstock

Detail White Embossing Powder

Wink of Stella Glitter Pen

Glossy Accents

Copic Markers


Copics Used:

Cone - YR24, Y23, Y21, Y32

Ice Cream - YR31, YR30

Green Goo - YG03, YG01, YG17

Eyeball Irises - V12, V15, V17


Thanks for stopping by today!

Monday, September 21, 2020

Simon Says Stamp & Whimsy Stamps #STAMPTEMBER Collaboration

 Oh, hi! I've got three cards to share today using the EVER.SO.CUTE Happy Pugmas Stamp Set. AND, there are coordinating dies, too!

This is a collaboration with Simon Says Stamp and Whimsy Stamps for #STAMPTEMBER


All the deets can be found in the video:

{Supplies used are linked in the text in this post. Compensated affiliate links may be used at no additional cost to you. Thank you for your support!}


Thanks for stopping by today!

Sunday, September 20, 2020

Whimsy Stamps Dead Dolly

 Oh, hi! I've got a couple cards to share today using the new Dead Dolly stamp set by Whimsy Stamps.

These little dollies are pretty cute . . . in a creepy kind of way . . . 

Here's the first card:

{Supplies used are linked in the text in this post. Compensated affiliate links may be used at no additional cost to you. Thank you for your support!}

I started out by creating a mask for the moon. Then I used Milled Lavender, Victorian Velvet, and Seedless Preserves Distress Oxide inks to create the sky.  I used Ground Espresso and Vintage Photo Distress Oxide inks to create the ground.  For the moon, I used Hickory Smoke and Squeezed Lemonade Distress Oxide ink.

I die cut the tombstones from the Build-a-Graveyard Die Set from Gray cardstock and added a bit of Hickory Smoke Distress Oxide ink around the edges. Then I die cut the fences and bats from black cardstock and adhered them to my ink blended panel.

I stamped the images on to Cougar Super Smooth Cardstock and colored them up with my Copics. I used my Brother Scan n' Cut machine to cut them out and popped them up with foam tape on the card panel.

I adhered that to the front of a top folding black notecard.

For the second card, I really wanted to use the new Wobbly Windows Slimline Die . .. I just knew the dollies would be perfect with it.


I used the same Distress Oxide inks for the background and then splattered it with Dylusions White Ink Spray and Ground Espresso Distress Oxide ink.

Next, I ran it through my Gemini, Jr. die-cutting machine and adhered it to the front of a dark brown slimline card base.  I embossed the sentiments with Detail White Embossing Powder.

I stamped the dollies onto Cougar Super Smooth Cardstock and colored them with my Copics.  I ran them through my Brother Scan n' Cut and added foam tape to the back of them and adhered them to the from of the card.

Supplies Used:

Dark Brown Cardstock

Distress Oxide Inks:

Copics Used:
Skin - E42, E41, YR30, E50
Hair - E25, E23, E31
Green Outfit - YG05, YG11
Pink Outfit - RV34, R83
Eyes - B41, C3, C1, 0
Bird - Y19, C3, C1, 0
Breadcrumbs - E35

Thanks for visiting today!

Saturday, September 19, 2020

Monster Parade!

Oh, hi! Here's another quick and easy card! I used the new Monster Parade Die Set and Vampire Paper Pack from Whimsy Stamps.

This card came together so quickly . . .the only thing I stamped is the sentiment from the You're My Boo Stamp Set. I almost feel like I cheated.

{Supplies used are linked in the text in this post. Compensated affiliate links may be used at no additional cost to you. Thank you for your support!}

Supplies used:

Whimsy Stamps Monster Parade Die Set

Whimsy Stamps Vampire Paper Pack

Whimsy Stamps You're My Boo Stamp Set

Whimsy Stamps Quick Strips Die Set

Sirio Ultra Black Card Stock

Versamark Ink

Detail White Embossing Powder

Thanks for stopping by today!


The Sounds of Halloween Video Hop

Oh, hi! I'm excited to be participating in a video over on the Whimsy Stamps Channel. We are hoping to increase the watch time on the Whimsy Stamps Channel while providing you with a little Halloween inspiration. So be sure to hop along the four videos leaving a comment on each video for a chance to win a fun prize pack.


For my card I decided to use the Monster Parade die set . . . and there's a surprise when you open the card . . .but you'll have to watch the video to see . .. or should I say, hear . . . what that surprise is.

{Supplies used are linked in the text in this post. Compensated affiliate links may be used at no additional cost to you. Thank you for your support!}

Please see the description box over on YouTube for all the deets on the giveaway and a list of all the supplies I used.


Thanks for stopping by today!

Wednesday, September 16, 2020

Two Quick Cards with a (SUPER) Creepy Clown

 Oh, hi! I've got two quick cards to share with you today. I should warn you though . . .if clowns aren't your thing, you might want to skip this post.

Anywho . . .for the first card, I used the Creepy Clown stamp and the Haunted Parlor stamp (seriously, I love this stamp!).

{Supplies used are linked in the text in this post. Compensated affiliate links may be used at no additional cost to you. Thank you for your support!}

I stamped the Creepy Clown using Versafine Onyx Black ink. Then I stamped it onto a piece of masking paper to mask him out so I could then stamp the Haunted Parlor.  For the Haunted Parlor I used Memento Gray Flannel Ink.

I did a little bit of ink blending using Catherine Pooler Melon Ice and Memento Gray Flannel Inks, making sure to keep a nice highlight in the center.

I colored in the doorway in the top left with a black Copic marker and added spooky eyes with a white gel pen.  Once the gel pen was dry, I did a quick swipe with YG01 to make the eyes glow.

For extra creepiness on the clown, I used a white gel pen on his teeth and a black glaze pen on his eyes.

I die-cut that panel with a Wonky Stitched Rectangle die and adhered it to a piece of black cardstock that was cut just a tad bit bigger.  Then I adhered that to a gray notecard and Viola! Card #1 is done.

The second card was even easier!


I cut a piece of paper from the Haunted Paper pack down to a little smaller than 4" x 5 1/4" and stamped the clown and sentiment using VersaFine Onyx Black Ink. I adhered that to a piece of blue card stock that's just a tad bit bigger and then adhered that to a black notecard.

And, of course, for more extra creepiness, I used a white gel pen on the teeth and a black glaze pen on his eyes.  And there you have it! Card #2 done!

Thanks for stopping by today!

Supplies Used:

Whimsy Stamps Creepy Clown stamp

Whimsy Stamps Haunted Parlor stamp

Whimsy Stamps Wonky Stitched Rectangle Dies

Whimsy Stamps Haunted Paper Pack

Versafine Onyx Black Ink

Memento Gray Flannel Ink

Catherine Pooler Melon Ice Ink

Neenah Classic Crest Cardstock

Real Gray Cardstock

Sirio Ultra Black Cardstock

White Gel Pen

Black Glaze Pen

Make Up Blending Brushes

Ad-Tech Tape Runner

Black Copic Marker

Thanks for stopping by today!


Tuesday, September 15, 2020

What's a Haunted Parlor without Ghosties?

Oh, hi! I mentioned that I was loving the Haunted Parlor Stamp . . .and I really am!  Here's another card I created using it, along with the Spirited Sentiments Stamp Set and the Foolish Mortals die.

This card came together really quickly!


I stamped and embossed the image onto a piece of gray cardstock. Then I stamped the ghosts onto vellum and cut them out. I ran them through my little Xyron Sticker Maker to hide the adhesive and attached them to the card panel.

I die cut Foolish Mortals from white cardstock and used liquid glue to adhere it to the card panel. I adhered the whole card panel to a piece of white cardstock and then adhered that to a black notecard.

See? Easy-peasey!

Supplies Used:

Whimsy Stamps Haunted Parlor Stamp

Whimsy Stamps Spirited Sentiments Stamp Set

Whimsy Stamps Foolish Mortals Die

VersaFine Onyx Black Ink

Memento Tuxedo Black Ink

Real Gray Cardstock

Neenah Classic Crest Cardstock

Black Licorice Cardstock

Vellum

Xyron Sticker Maker

Ad-Tech Tape Runner

Detail Clear Embossing Powder

Thanks for stopping by today!

Monday, September 14, 2020

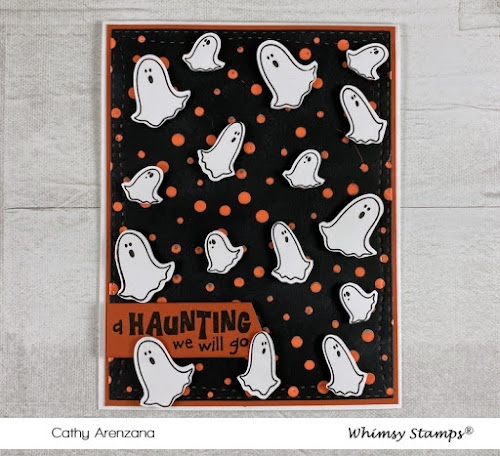
More Super Cute Ghosties!

 Oh, hi! I'm back with another card using the Spirited Sentiments stamp set by Whimsy Stamps.  This time I incorporated the totally awesome Haunted Paper Pack!

You guys! I love this paper pack so much . . .it pretty much does all the work for you!

{Supplies used are linked in the text in this post. Compensated affiliate links may be used at no additional cost to you. Thank you for your support!}

Supplies Used:

Whimsy Stamps Spirited Sentiments Stamp Set

Whimsy Stamps Haunted Paper Pack

Whimsy Stamps Licorice Paper Pack

Versafine Onyx Black Ink

Versamark Ink

Detail White Embossing Powder

Sirio Ultra Black Card Stock

Neenah Classic Crest Card Stock

Brother Scan n Cut Machine

Thanks for visiting today!

Sunday, September 13, 2020

What IS that??

Oh, hi! I am loving the Haunted Parlor stamp by Whimsy Stamps! There are soooooo many things you can do with it!

Look closely . . . do you see the hand coming out from under the couch? And from the doors? And what about those eyes peering at you from the floor?

{Supplies used are linked in the text in this post. Compensated affiliate links may be used at no additional cost to you. Thank you for your support!}

I stamped and colored the image first. . .then I used my craft knife to cut openings for the under the couch and the doors.  The "hands" aren't hands at all . . .they are the teeth from the skull dies from the Build-a-Graveyard Die Set.

The eyes . . .I just used a white gel pen for those.  Creepy, huh?

Supplies used:

Whimsy Stamps Haunted Parlor Stamp

Whimsy Stamps Build-a-Graveyard Die Set

Whimsy Stamps Wonky Stitched Rectangle Dies

Sirio Ultra Black Cardstock

Cougar Super Smooth Cardstock

Memento Tuxedo Black Ink

Memento Gray Flannel Ink

Catherine Pooler Melon Ice Ink

Copic Markers

Make-Up Blending Brushes

Gemini Jr. Die Cutting Machine

White Gel Pen

Copics Used:

Floor & Stairs - E44, E43, E42

Hole in the Floor - E49, E47

Walls - E31, E51

Door Frames and Bannister - E49, E47

Doors - E99, E37

Clock - E37, E35, E41, Y28

Couch - C5, C3, C1, 0

Chair - E37, E35, B99, B97, B93

Carpet - B99, B97, B93

Doorway - 100

Thanks for visiting today!

Saturday, September 12, 2020

Whimsy Stamps Spirited Sentiments

 Oh, hi! Quick post today . . .actually, I'm gonna have a few quick posts over the next few days, so be sure to come back and check out what I've been up to in my craft room lately!

Anywho. . . .here's a card I created using the Spirited Sentiments stamp set by Whimsy Stamps.  Aren't these ghosties EVER so cute??

{Supplies used are linked in the text in this post. Compensated affiliate links may be used at no additional cost to you. Thank you for your support!}

All the deets and a full list of supplies can be found over on my YouTube Channel.

Thanks for visiting today!

Thursday, September 10, 2020

Pumpkin Kisses & Harvest Wishes Blog Hop

Welcome to the “Sending you Pumpkin Kisses & Harvest Wishes from Not 2 Shabby & Kat Scrappiness!” We are thrilled you could join us on this blog & Instagram hop celebration! Kat Scrappiness has some of the best stamps, dies, and embellishments around and Not 2 Shabby is very excited to carry their products! Come hop with us and see what all the excitement is about!

The blog & Instagram hops and giveaways will start Thursday, September 10 and will end on Tuesday, September 15th. We will have 4 x $15 winners!! 2x pulled from blog comments and 2x pulled from the Instagram comments.


For this hop, we are showcasing the Double Stitched Nesting, Wonky Stitched Nesting and Tri-Frame slimline dies from Kat Scrappiness and the "Happy Fall" Stamp set from Not 2 Shabby.


Here's my card:


I love the Wonky Stitched Nesting Dies because you can create the perfect frame using the two largest dies. And how cute, cute, cute is that scarecrow?!? And the Crow?!? Of course, I had to have those cuties surrounded by all the fall leaves, pumpkins and acorns.

Here's the full list of the Hop Participants:

@jamie_scrappinstampers

To participate in the hop giveaway, simply leave a comment on each blog post, follow each Design Team Member on Instagram, comment and tag your friends. The more you comment the more chances of winning. Bonus entries for following our stores on all our social media below:

Not 2 Shabby Facebook Page: https://www.facebook.com/not2shabbyshop

Not 2 Shabby Card Group: https://www.facebook.com/groups/103832353026882

Not 2 Shabby YouTube: https://www.youtube.com/scrappinstampers

Not 2 Shabby Instagram: https://www.instagram.com/jamie_scrappinstampers/

Kat Scrappiness Insiders group: https://www.facebook.com/groups/KatScrappiness/

Kat Scrappiness Business Page: https://www.facebook.com/KatScrappiness/

Kat Scrappiness YouTube: https://www.youtube.com/user/thekatsmeow1969

Kat Scrappiness Instagram: https://www.instagram.com/katscrappiness/

The winners will be announced on the Not 2 Shabby and Kat Scrappiness blog on September 18th. You will need to contact us to claim your prize. You can subscribe to our blogs for a notification email on any new blog posts. You will have 7 days to claim your prize.

Thank you for hopping with us and supporting our small businesses!

10