After I colored her, I used the Classic Ovals Dies by Spellbinders to cut her out. Then I cut a piece of yellow card stock using the Classic Scallop Oval Dies, also by Spellbinders.
I used foam tape to pop up the ovals on a piece of patterned card stock measuring 4" x 5 1/4". I adhered that to a yellow mat measuring 4 1/8" x 5 3/8" and finally, onto an A2 top folding card.
It's the most wonderful time of the year! You guys! The first day of fall actually felt like fall! It was cool and cloudy and rainy. That's pretty unusual in these parts . . . and, it appears that it's not going to last because we're going to be right back up in the 90's this week. But, I'll take what I can get.
Along with fall comes Halloween! My absolute favorite! And there are so many great Halloween stamps out there, too! Take this one, for example:
{Supplies used are linked in the text in this post. Compensated affiliate links may be used at no additional cost to you. Thank you for your support!}
Who doesn't love a kitty in a hat, scarf, and sweater just chilling on a crescent moon wrapped in purple ribbon??
Oh yes, there is a video, too:
Okay, so this stamp is called Witchy Kitty 2 and it's by Impression Obsession. I know, I know . . . I've said it before, but gosh, you guys, I just love images that are unique. And there are a few other Witchy Kitties too, just in case you need more than one. (because, I do!)
Anywho. . . on to the card:
I stamped the image using Memento Tuxedo Black ink on to Neenah Solar White card stock. Then I colored it up using Copics (colors listed below). And then. . . I got stuck. Seriously, I sat and stared at it for at least 20 minutes before figuring out how I was going to finish up the card.
I knew I wanted to have clouds in the background and I also knew that the only way to do that was to use my Cloud Stencil. But, I didn't want to get ink all over all that coloring I just did, so I made a mask.
I just stamped the image onto a piece of scrap paper and used my Zig 2-Way glue pen as a temporary adhesive. Here's an important note: The glue is only temporary if you let it dry before placing over your stamped image.
Once my mask was in place, I used a sponge and very lightly dabbed VersaFine Smokey Grayink all over. Then I went in with my cloud stencil and sponged more ink. I applied the ink pretty generously, but only along the top edge of the stencil to keep some separation between all the clouds. After I was done, there were a few spots that need more gray ink, so I just did a bit more light dabbing in those areas.
When I was happy with my cloudy sky, I removed the mask and I gotta tell ya. . . I was really happy with how it turned out! I was going to use Black Soot Distress Ink, but I'm sooooooo glad I went with the gray!
To finish up the card, I adhered the patterned paper to a piece of black card stock and adhered that to my card base. Then I adhered the Kitty to a piece of black card stock using liquid glue and added that to the card front with foam tape.
I really did have every intention on having a video to go with this card. But, I forgot to turn the camera back on after a short break. . . sooooo, there's no video. I know, I know . . . bummer.
But, I still wanted to share the card, because I'm really happy with how it turned out.
{Supplies used are linked in the text in this post. Compensated affiliate links may be used at no additional cost to you. Thank you for your support!}
After the coloring was done, I used the Fancy Edged Oval dies from Spellbinders to cut it out. I adhered that to a Scalloped Rectangle that I cut using the Scallop A2 Frame dies from Honey Bee Stamps.
I adhered that to a piece of patterned card stock measuring 4" x 5 1/4". I wanted even more yellow, so I adhered it to a piece of yellow card stock measuring 4 1/8" x 5 3/8".
And finally, I adhered that to an A2 Top Folding card. Viola! All done!
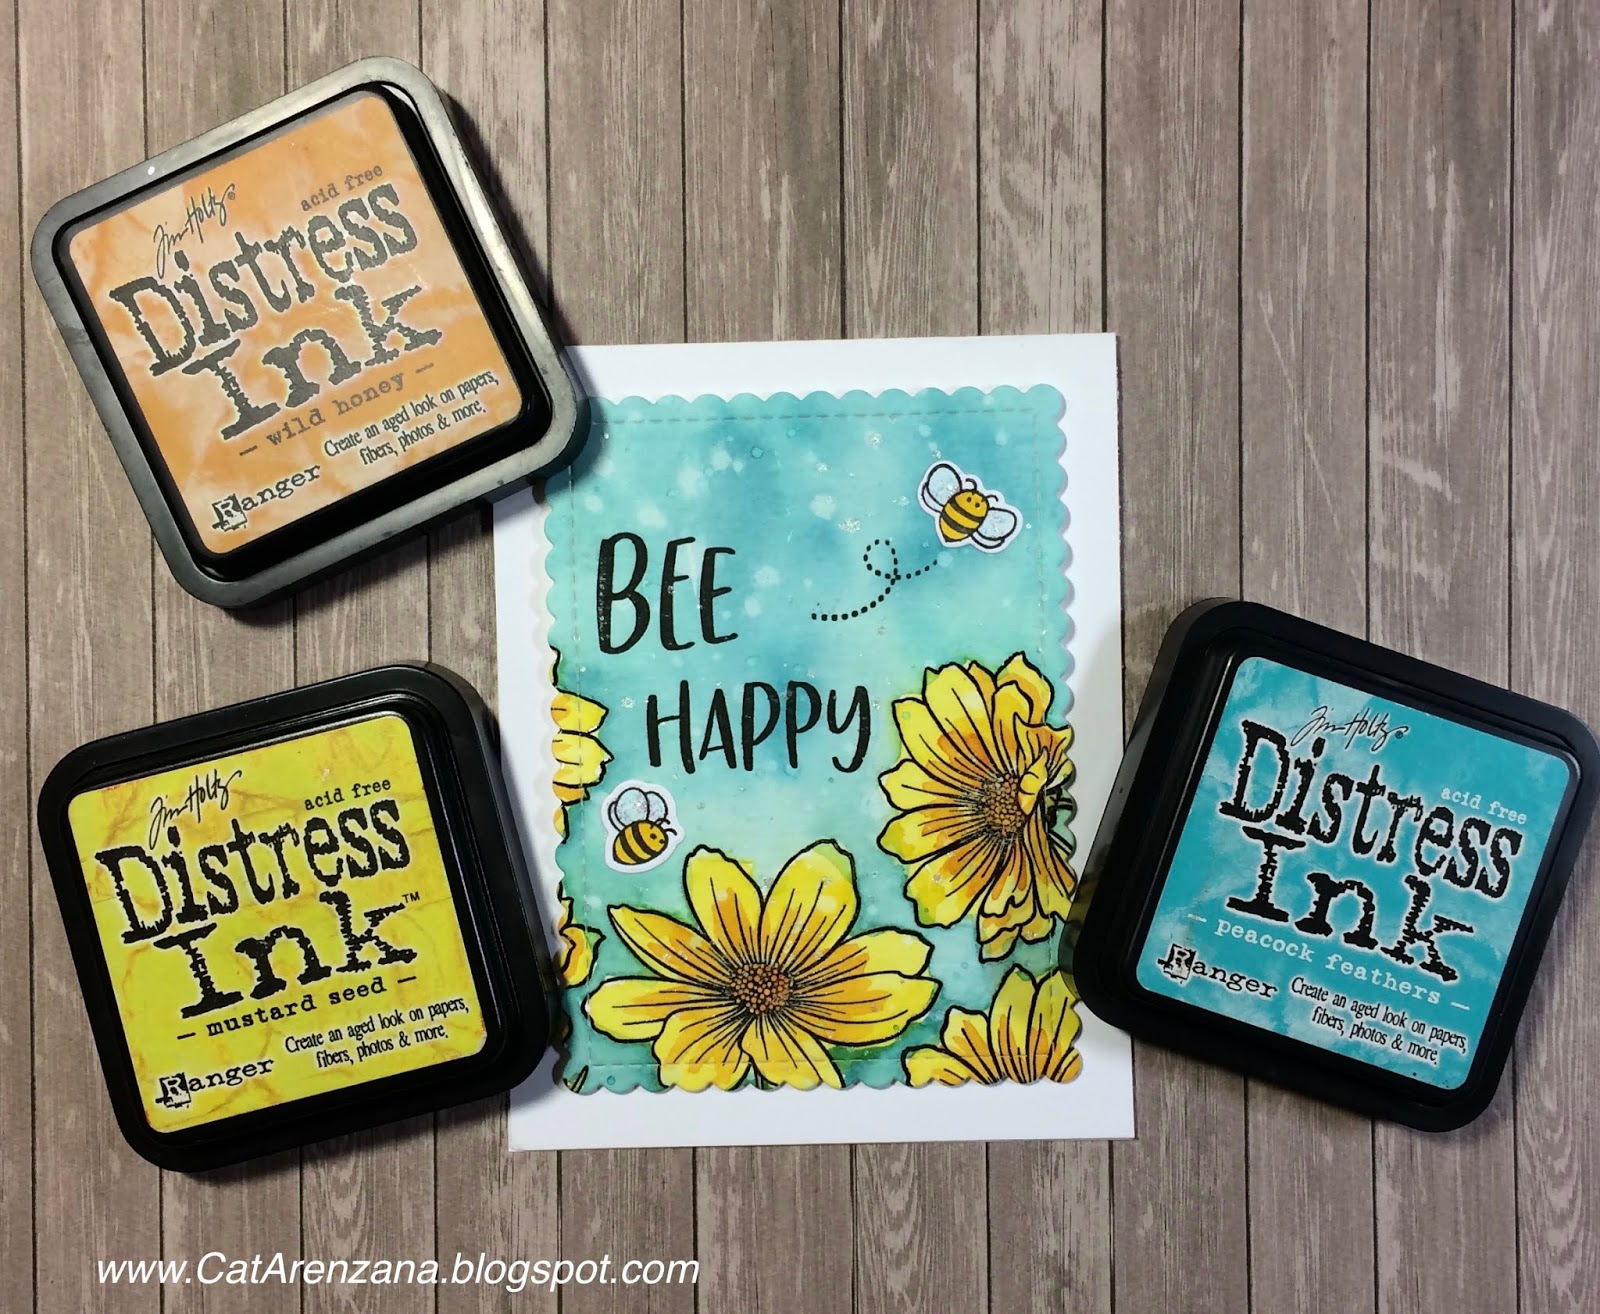
Oh, hi! I may or may not be slightly obsessed with these stamps and dies from Honey Bee Stamps. And, I really stepped out of my comfort zone and did some watercoloring using Distress Inks.
{Supplies used are linked in the text in this post. Compensated affiliate links may be used at no additional cost to you. Thank you for your support!}
Here's a video showing the process . . . and a bit of yada-yada on my part. Yep, I'm still getting used to voice overs.
Once I was done with that, I smooshed Distress Inks directly onto my Ranger Craft mat and used it as a palette to pick up color with a wet paint brush.
For the flower petals, I used Mustard Seed and Wild Honey. For the flower centers, I used Spiced Marmalade. The stems were done with Peeled Paint and the background was done in Broken China and Peacock Feathers. (pssst . . . Honey Bee has a great price on the Mini Distress Ink Cubes.)
After all the watercoloring was done and completely dry, I die cut it with the second largest die from the A2 Scallop Frameset.
I masked off a portion of the sentiments from the Hi Honey stamp set before inking them up so I could get just the words wanted. I added a few bees from the Bee Hive stamp set, colored them up using Copics and die cut them with the coordinating dies.
The final step after adhering the bees to the card was to add some Stardust Stickles to their wings. And there ya have it! All done.
I decided to do a more in depth video about coloring pleats with Copic Markers because I brought it up in this video, but it was a bit hard to see what I was doing.
Oh, hi! I'm back today with a card that I created for Stamp Club. Each month we have to create card around a specific theme. For the month of September, the theme is School Days. Which turned out to be a bit of a challenge because I have no school themed stamps. Not one.
But, I knew I had card stock that resembled a chalkboard so I dug that out and designed my card around that:
{Supplies used are linked in the text in this post. Compensated affiliate links may be used at no additional cost to you. Thank you for your support!}
I used the Scallop A2 Honey Cuts from Honey Bee Stamps to cut the "chalkboard" and the frame.
I used the same size die for both of them. These dies have some stitching detail which made it really easy to cut the scallops off the chalkboard so it would fit perfectly within the frame.
Now, one of the things that I didn't catch on film was how I created the "floor" of the classroom. To do this, I used a ruler (and actually managed to draw two straight lines) to create the "baseboard." I colored that in with E27.
For the floor, I colored the whole strip of card stock with E42 and then drew very random lines to create some texture. I'm not sure if that's carpet or a wood floor . . . I suppose it could be either.
Woooo hooooo! It's finally starting to feel like Fall here. The temperature has dropped down to the 70's and we've had a fair amount of rain over the last week. So, of course, with the rainy weather, I spent time in my craft room with my stamps and markers.
May I present to you: Tiny Townie Patricia. She loves pumpkins.
{Supplies used are linked in the text in this post. Compensated affiliate links may be used at no additional cost to you. Thank you for your support!}
And, here's the video to go with it. I go over how I finally figured out how to color pleats to make it easy for me. I hope it helps you, too. Oh. . . and at one point while coloring the leaves, I said I used E34 to go over the leaves to blend, however, I actually used Y26.
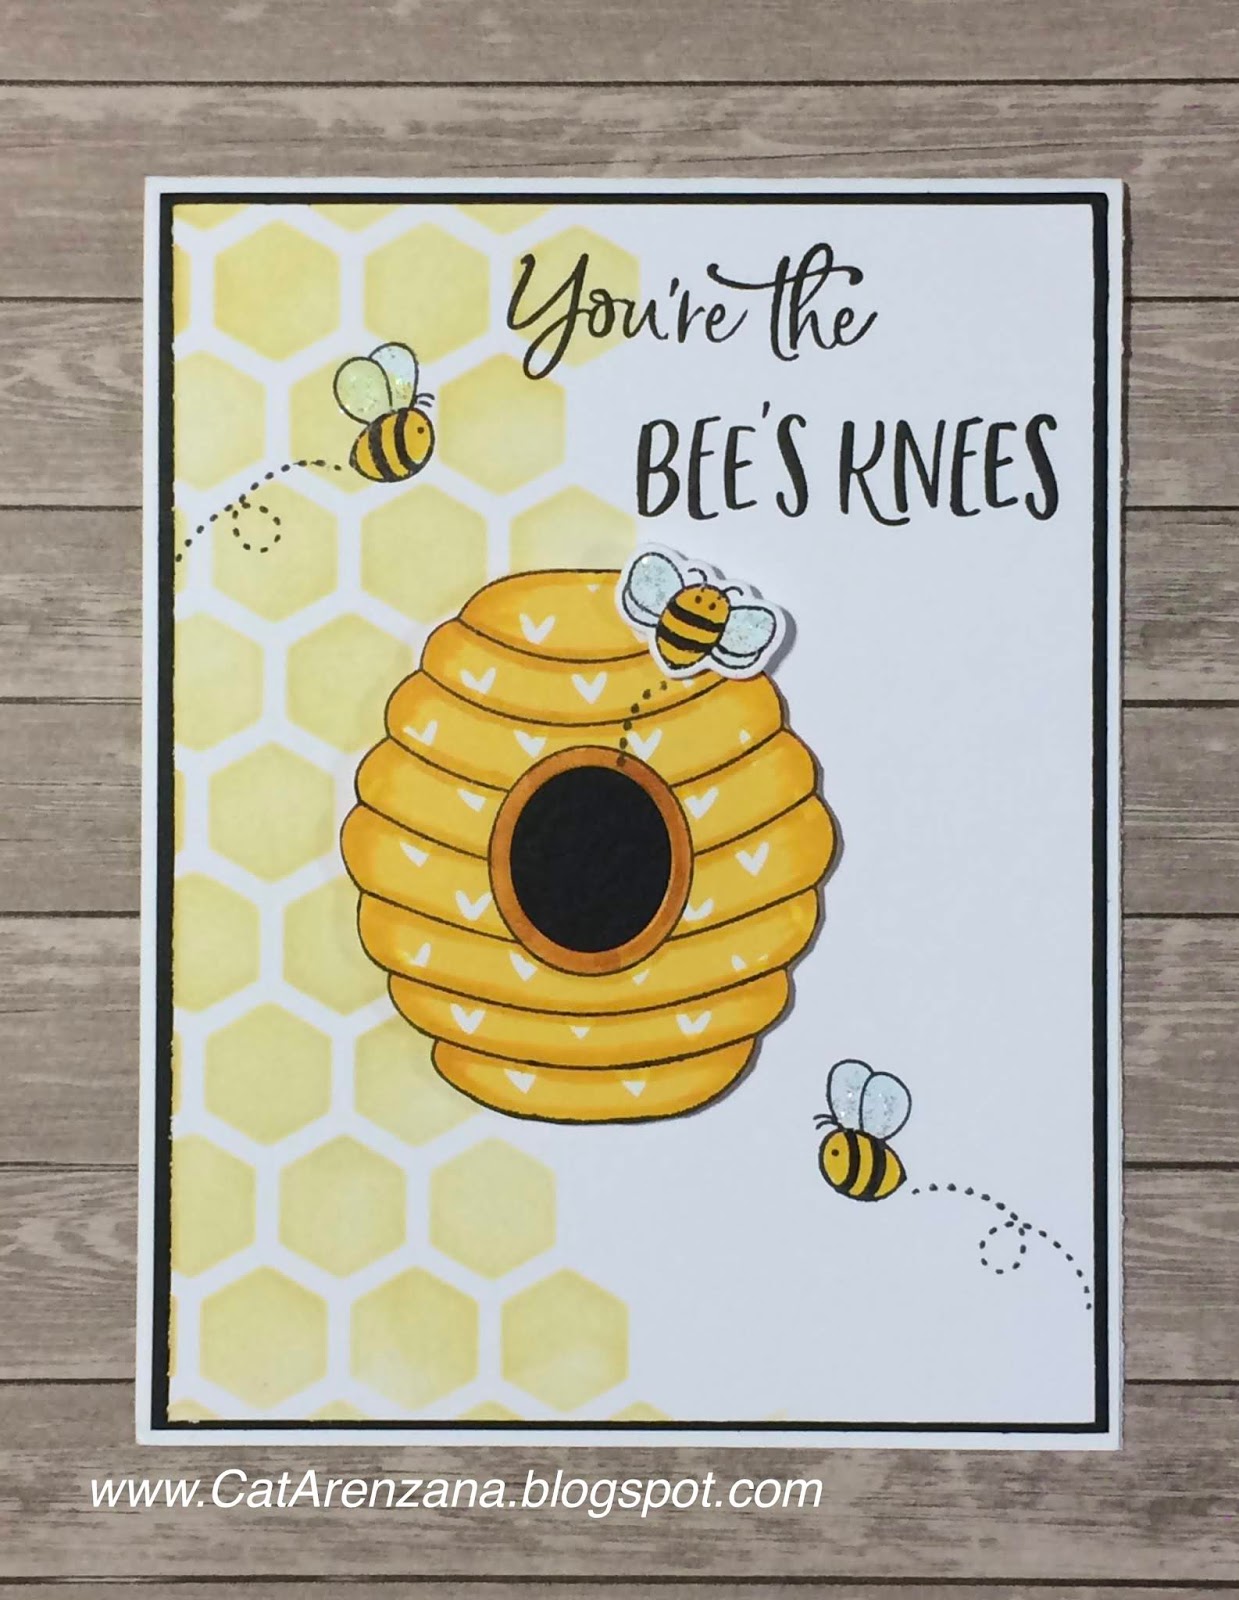
Oh . . .hi! I'm back with a quick and easy card today. When I saw these little bees from Honey Bee Stamps, I knew they had to come and live in my little studio! They are so stinkin' cute!
{Supplies used are linked in the text in this post. Compensated affiliate links may be used at no additional cost to you. Thank you for your support!}
And there's a video, too! I think I'm getting the hang of this video stuff. If you haven't subscribed yet, you can do so right over there in the top right hand corner.
Then I stamped the Beehive onto patterned paper with Memento Tuxedo Black ink. I cut that out by hand, but used the dies that coordinate with the stamps to cut out the center of the hive.
I added a little bit of shading to the Hive using Y15 and YR24 Copic Markers.
I stamped the left- and right-facing bees directly on the stenciled panel and colored the bodies with Y15 and the wings with BG0000. I stamped the front-facing bee on a scrap piece of paper and colored him with the same colors. I used the coordinating die to cut him out.
I used foam tape to adhere the Beehive to the stenciled panel and then added the front-facing bee to the top of the hive with foam tape, as well.
I stamped the bee "trails" in Tuxedo Black ink and the sentiment in Onyx Black VersaFine ink. To finish it up, I added some Star Dust Stickles to all the wings. And there ya have it! Quick and Easy!
I decided to sit down and just play with the My Monthly Hero August Kit from Hero Arts and came up with 5 cards using a few different techniques. This kit sold out so fast! I sure am glad I got my hands on one!
{Supplies used are linked in the text in this post. Compensated affiliate links may be used at no additional cost to you. Thank you for your support!}
Oh! And there's a video, too.
Okay. . . so here's the first card:
The kit came with this super cute Cafe Die. To create the card, I inked up a white panel using Tumbled Glass, Salty Ocean and Blueprint Sketch Distress Oxide Ink.
I then placed the die on my inked panel and ran it through my Gemini Junior (which cuts these detailed dies like.a.dream.!). I adhered it to a white panel cut slightly larger than the die, and then adhered that to a top folding A2 sized card.
For the little coffee cup on the sign, I just ran the die through my machine again and cut out one of the cups that is sitting on the table. I used a White Gelly Roll pen to add some steam coming out from the cup. Easy Peasy!
Onto the second card:
I started by stamping the mug in Memento Tuxedo Black ink onto a piece of Neenah Solar White cardstock. I colored that up using Copic Markers: BG02, BG05 and BG09. For the coffee, I used E23, E25, and E27.
Then I stamped the sentiment on the cup in Memento Luxe Wedding Dress ink and heat embossed it with Nuvo Glacier White Embossing Powder.
The next step was to create a mask so I could stamp a bunch of sentiments in the shape of a circle for a background. I did that by using circle die on a piece of regular printer paper. I used temporary adhesive to hold it in place while I stamped the sentiments. You'll see in the video that I arranged all of the sentiments on one acrylic block to make it a bit easier. For the stamping, I used Jumbo Java VersaMagic ink.
After adhering all the pieces to a card, I used foam tape on the mug for some dimension. And there ya go! All done.
Card #3:
The first thing I did for this card was to randomly stamp the sentiment onto a piece of Canson Watercolor card stock. I used Memento Luxe Wedding Dress ink so I could heat emboss it. After that, I used Gathered Twigs Distress Ink to do a watercolor wash over the embossed sentiments.
The coffee cups were also stamped on watercolor card stock, but I used VersaFine Onyx Black ink and heat embossed with Nuvo Clear Embossing Powder. Then I watercolored the saucers using Tumbled Glass Distress Ink, the cups in Broken China Distress Ink, and the coffee in Gathered Twigs Distress Ink.
Once it was nice and dry I stamped the foam in Memento Luxe Wedding Dress ink and used the White Puff Embossing Powder that came with the kit. It doesn't show very well in the picture, but that powder really does get puffy!
I thought that at least one of those cups needed a spoon, so I used my Cricut to cut that out. And there ya have it! Finito.
Ah . . .Card #4. . . Sunflower Cups
I was inspired to put sunflowers on these cups because they reminded me of cups that I actually saw at Pier 1 (at least one hundred years ago). But I loved those cups. I loved the contrast of the cobalt blue and yellow/orange sunflowers.
Anywho. . . to get those sunflowers on those cups, I created a "reverse" mask by stamping the images on a sticky note and I only cut out the inside of the image. (You can see how I did that in the video). Once I placed the mask over my stamped image, I stamped the sunflowers from the Sunny Harvest Stamp Set by Power Poppy right over the mask.
Then I colored them up using Copics. For the mugs, I used B23, B24, B18 and B27. For the Sunflowers, I used YR12, YR14, YR18. For the flower centers I used E23, E25, E27 and E29. I used the same browns except E29 for the coffee in the cups. For the shadow under the cups, I used C1, C3 and C5.
I put it all together, and Viola! All done.
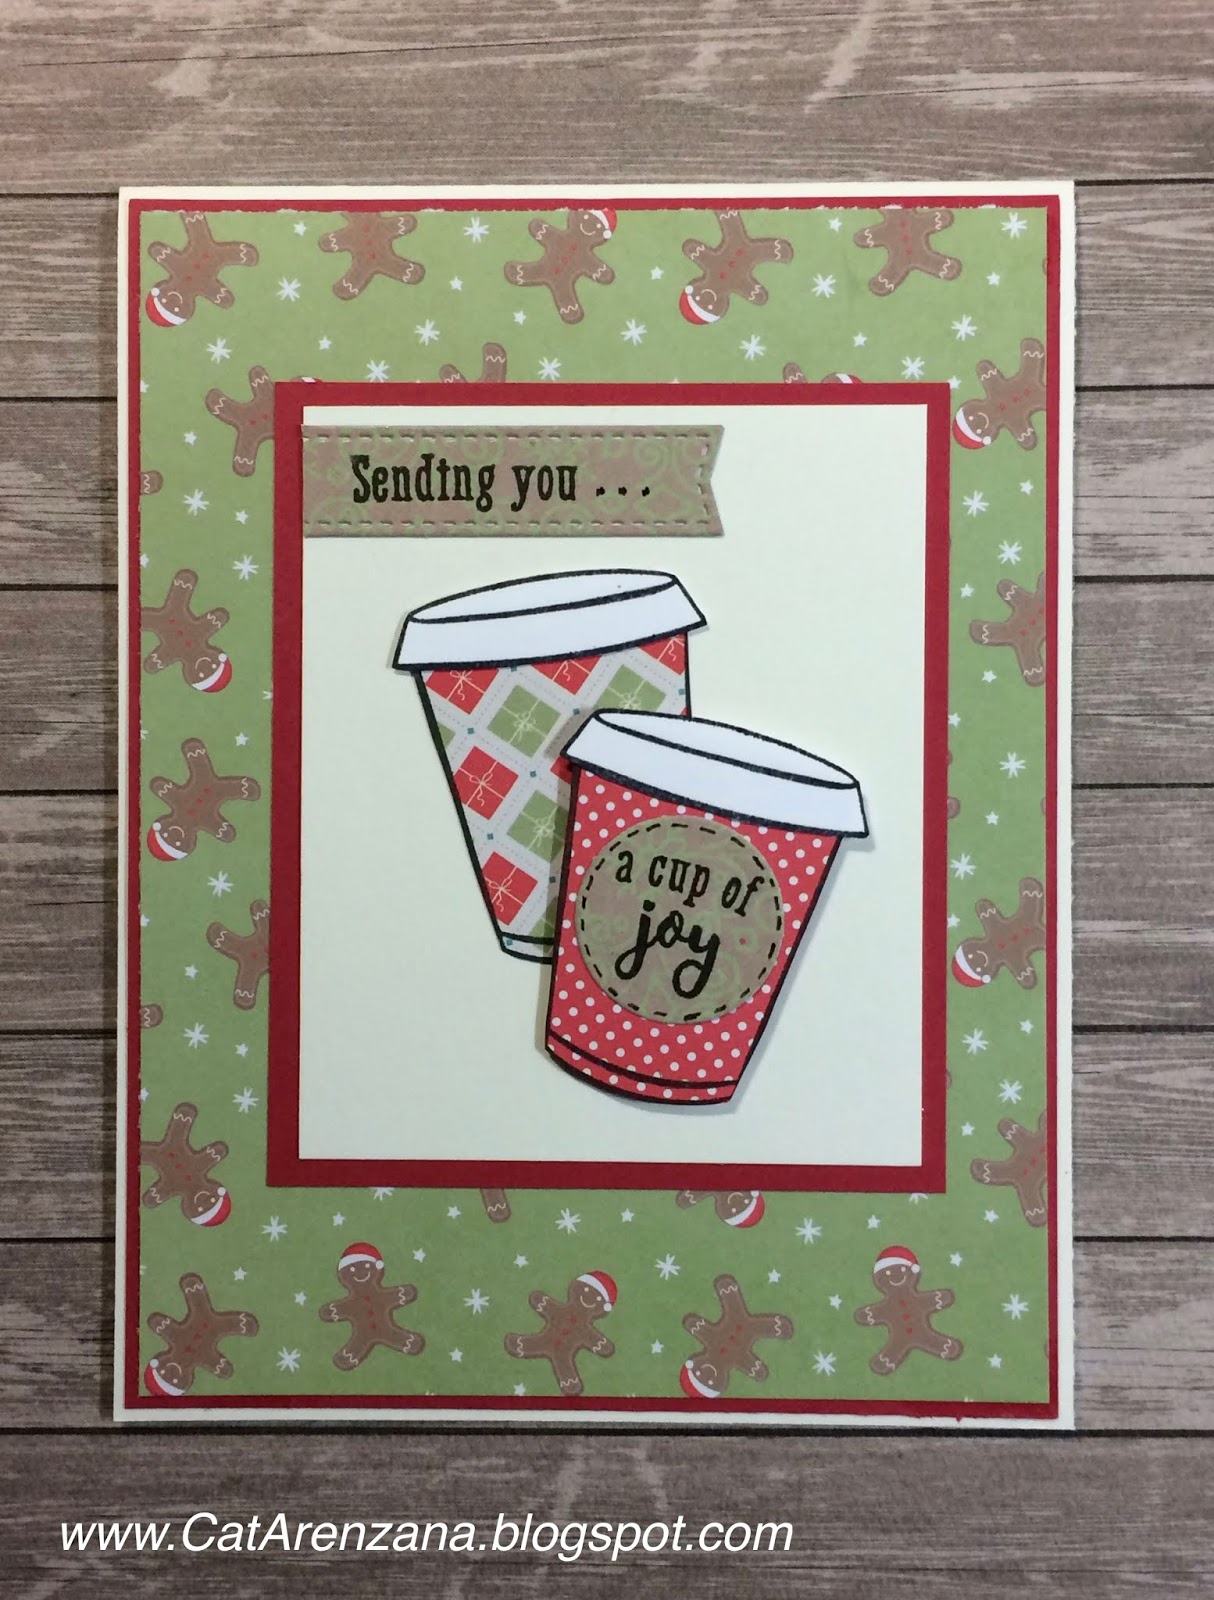
And here's the fifth card. . .
This card was pretty quick and easy. I stamped the to-go cup using Memento Tuxedo Black ink onto patterned paper and cut them out with scissors. Then I stamped the lids onto white cardstock and also cut them out by hand.
To get the "Sending you," I performed a bit of stamp surgery and cut the stamp apart. The full sentiment reads "Sending you a Latte Love". . . but I wanted to send "a cup of joy." Sometimes, surgery is necessary.
So, after the surgery, I stamped "Sending you" onto a fishtail banner that I die cut from patterned paper. The circle is also a die and that sentiment fit on it perfectly! Here's a little tip: stamp first and then die cut. I added little dashes around the edge of the circle using a fine tip black pen.
I adhered the plaid cup with Tombow Mono Multi Glue and the polka dot cup with foam tape. Put it all together and Ta-Da! All done.