Oh, hi! Were you expecting another mouse? Sorry, not today. It's been raining here all morning, so I thought I'd drop in a rainbow.
{Supplies used are linked in the text in this post. Compensated affiliate links may be used at no additional cost to you. Thank you for your support!}
As with most of my cards, this one started out in one direction and ended up going in a totally different direction. But, I'm quite pleased with where it landed.
Next I pulled out my Distress Inks so I could do some easy watercoloring. I used Barn Door, Spiced Marmalade, Fossilized Amber, Peeled Paint, Mermaid Lagoon, and Seedless Preserves.
I smooshed the ink pads directly onto my non-stick craft sheet and picked up the colors with a wet paintbrush. Then, I just slathered the colors where I wanted them to go. Talk about a quick and easy card!
Once it was dry, I used my trusty stitched rectangle dies to cut the watercolored panel and a frame from black glossy card stock. Yes, you read that correctly. Black Glossy Card Stock. I was pretty surprised that I still had some in my stash. But, I thought it would be perfect to use for the frame because I embossed the image.
I adhered the frame on top of the watercolored panel, then used foam tape to adhere that to a top folding notecard. Easy Peasy!
Oh, hi! Are you tired of this mouse yet? No? Good! Cuz neither am I! And I'm very excited to recreate a chocolate box that I taught in a class wwwwaaaayyyy back in January of 2015.
I had to make a few adjustments so I could use the Stacking Hearts Honey Cuts, but I promise, you guys, this is soooooo easy to make!
{Supplies used are linked in the text in this post. Compensated affiliate links may be used at no additional cost to you. Thank you for your support!}
The first thing I did was stamp the mouse on a piece of Desert Storm card stock and color him up with Copics. Then I stamped the rose and envelope on a piece of Solar White card stock and colored them up (individual colors listed at the end of this post). I used the coordinating dies to cut out the mouse, the rose and the envelope. For his overalls, I stamped them on a piece of blue paper and fussy cut them.
To create the chocolate box, I used 110# Solar White card stock because it's nice and sturdy.
I used the largest die from the Stacked Hearts set and cut two hearts from the white card stock, and one from patterned cardstock.
I used the third largest heart die and cut it from pink card stock and then embossed it with an embossing folder.
Next up, I made the box. Here's what I used:
A score board and bone folder
One piece of 110# card stock measuring 4 1/2" x 4 1/2" (this is the bottom of the box)
One piece of 110# card stock measuring 4 5/8" x 4 5/8" (this is the top of the box)
Scissors
Strong Liquid Glue
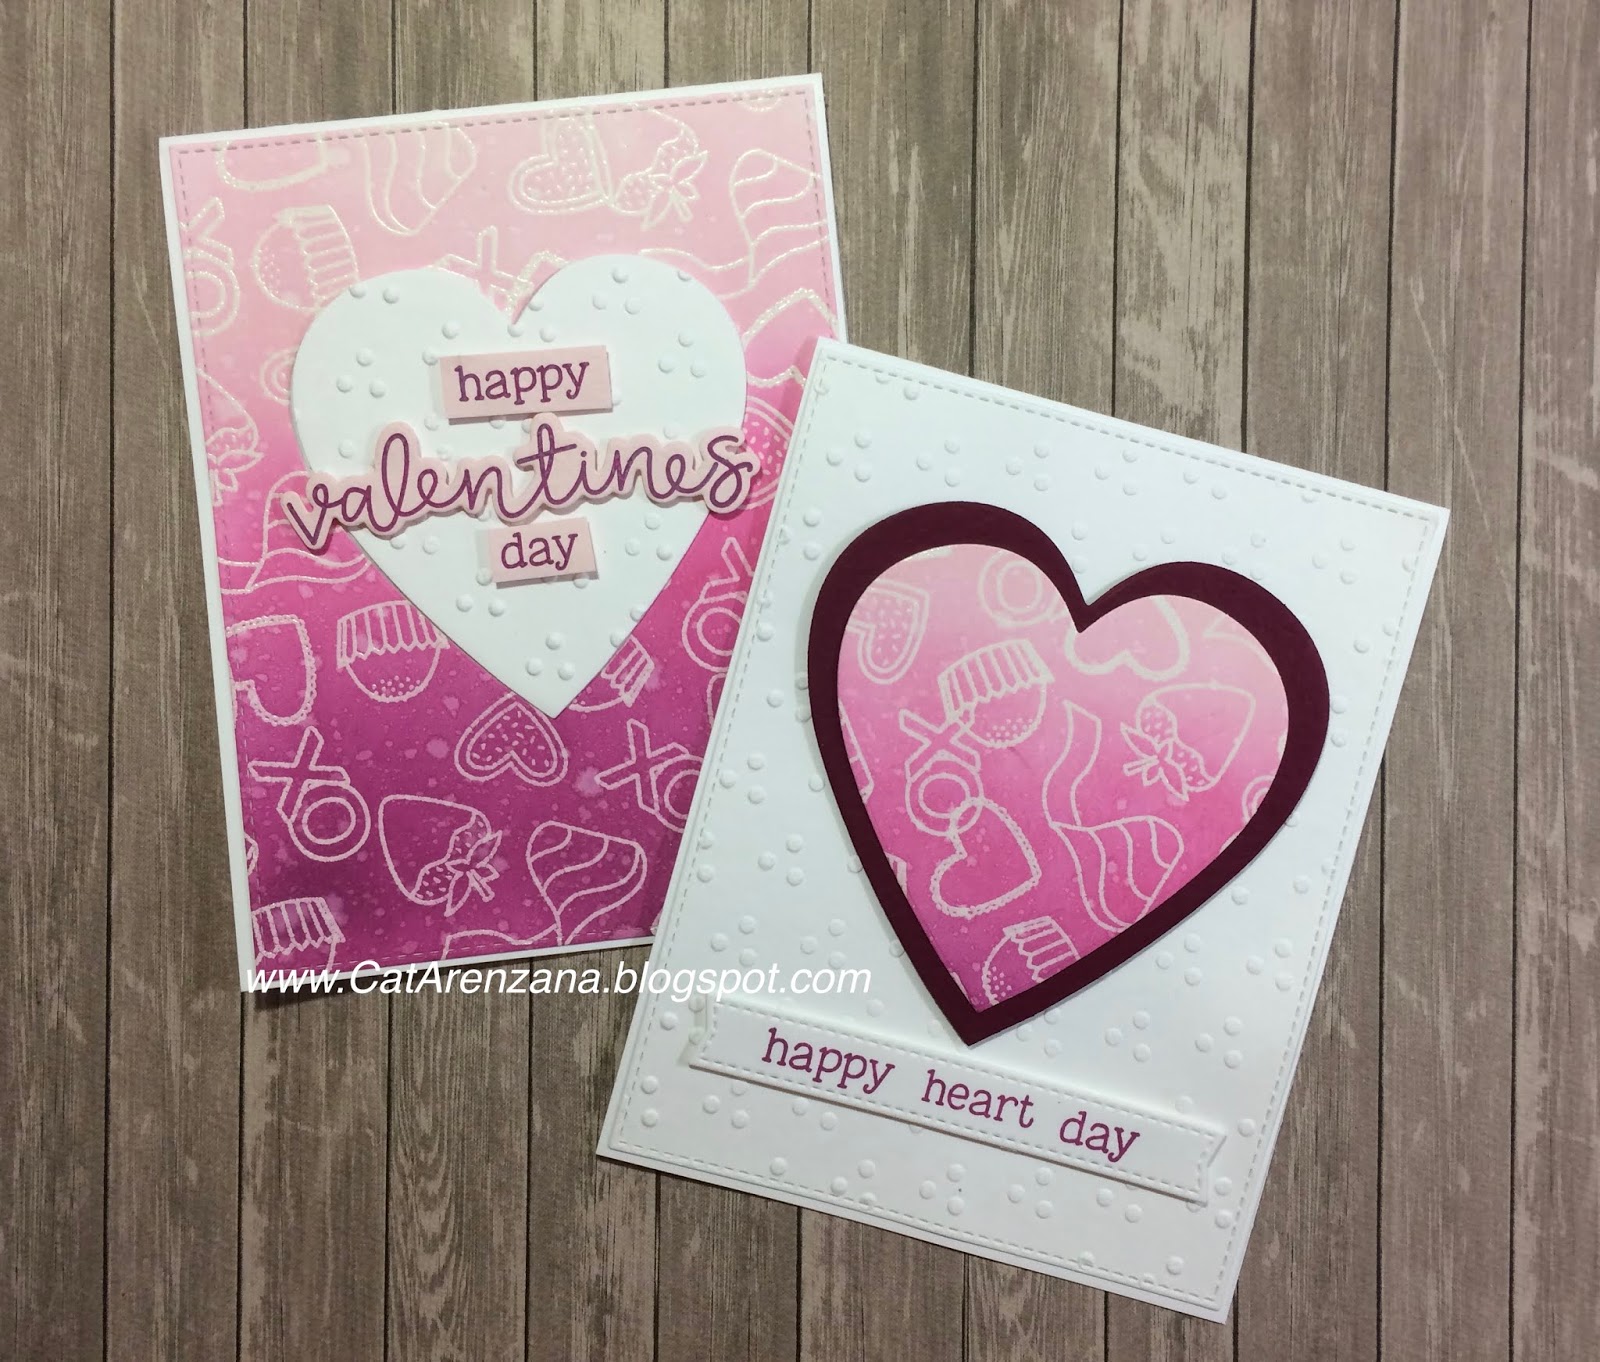
I love a good two-for . . . and creating backgrounds with Distress Oxide inks makes it pretty easy to do that.
{Supplies used are linked in the text in this post. Compensated affiliate links may be used at no additional cost to you. Thank you for your support!}
Oh, yes, I did use the Mae the Mouse stamp set, just no mouse this time. I really wanted to use all the "extras" in the set, so this is what I came up with.
I started by randomly stamping the images with Memento Luxe Wedding Dress ink all over a piece of card stock. Then I heat embossed the images with white embossing powder.
Next, I applied Spun Sugar, Picked Raspberry, and Seedless Preserves Distress Oxide inks using a mini ink blending tool. Once I was happy with the blending, I buffed off the excess ink with a soft cloth the sleeve of my sweatshirt. (Don't worry, it's a dedicated crafting sweatshirt.)
From there, I die cut a heart from the inked panel. Now I have two pieces to use for two cards.
Oh, hi! So, after making those fuzzy monsters, how could I not make a few fuzzy mice?? Especially because I have gray and brown Fun Flock . . . which is so perfect for mice, am I right?!?
{Supplies used are linked in the text in this post. Compensated affiliate links may be used at no additional cost to you. Thank you for your support!}
And, of course a mouse would wear an apron and chef's hat. Or overalls. I totally love all the images in this stamp set. . . but I think I've said that before, haven't I?
Okay, onto the first card. One of my sister's favorite books to read to her grandchildren is "If You Give a Mouse a Cookie," so naturally, I dressed up the first little mouse in an apron and chef's hat, and put a cookie in her hands.
For the second card, I decided to dress up that little mouse in a pair of denim overalls. Um, cuteness overload! To make the buttons stand out a bit, I went over them with a Silver Gel Pen. The stamp set has a few itty bitty sentiments that fit perfectly on one of the heart dies, so I made a candy heart for him to hold.
I thought a gatefold card would be perfect for this little guy. Especially because I wanted to use that giant blue heart.
To see how both cards came together, check out the video below:
Oh, hi! Have you ever purchased a stamp set and had your brain go into overdrive with all.the.things you could make with it? Oh my goodness, yes! That happened to me with the Mae the Mouse set by Honey Bee Stamps. That mouse is so cute, I almost can't stand it!
{Supplies used are linked in the text in this post. Compensated affiliate links may be used at no additional cost to you. Thank you for your support!}
Oh, but wait! The Brie Mine stamp set is filled with a bunch of sentiments to go along with that cutie! Everything from "sweet" to "cheesy." For this card, I went the cheesy route. Because, how could I not?! The greeting just made me giggle.
Anywho, this card was pretty simple to create. . . I randomly stamped the cheese onto a die-cut heart and added a bit of shading with Copic markers.
Then I stamped the mouse onto a piece of Neenah card stock and colored him (for this card he's a "he") using Warm Gray Copics.
And then I ran him through my die cut machine with the coordinating die. You guys! The die actually cuts around his little arms so all the accessories that are in the stamp set can be placed to look like he's holding it! Obviously, there is a piece of cheese in the set, but there's also a cookie, a rose, a letter, a strawberry . . . and so.much.more!
Seriously, my brain nearly exploded will all the ideas, and I can't seem to stamp fast enough.
Whoops . . . I went off on a bit of a tangent there. So, before I do that again, here's a video for you:
Oh, hi! Yep. . .you guessed it. I'm still working with the Hello Lovely stamp set. It's a thing I do when I get a new set. I try to make as many cards as I can with different layouts and techniques.
{Supplies used are linked in the text in this post. Compensated affiliate links may be used at no additional cost to you. Thank you for your support!}
So, for this card, I decided to use the whole floral spray and incorporate my Cricut so I could inlay a die-cut word.
I started out with a piece of 80# Neenah Solar White card stock that measures 5.5" x 4.25". I stamped the image using Altenew's Dark Chocolate ink. Since I was going to go with pink flowers, I thought that a brown ink would be a little bit softer than black ink.
After I had the main image stamped, I stamped the layers of the large pink flower with Frosty Pink, Cotton Candy, and Coral Berry inks by Altenew. I stamped the pink bud with Cotton Candy.
The yellow flowers were stamped in Mango Smoothie and the little daisy-ish flowers were stamped in Sno Cone.
The leaves were stamped in Memento Pear Tart, except the tiny sprig-like branches. I colored those in with a YG21 Copic marker.
Once all the stamping was done, I set up my Cricut to cut out the word "Hello." I did a video tutorial on how to do that for a previous card . . . you can see that right here.
After my Cricut was done cutting, I ran the stamped panel through my die-cut machine with a stitched rectangle die. (yeah. . . I just recently acquired two sets of stitched rectangle dies. . . and I love them. . . and I'll probably be using them in every project.)
From there is was just a matter of putting the card together. I have a few tips for doing that in the video:
Now, I can't say that there won't be more cards using this set. . . but truthfully, I'm really looking forward to making more Valentine's Day cards. . . which I'm going to go do now.
Oh, hi! I have to admit that making Halloween cards is my very favorite, but Valentine's Day cards run a very close second. I guess I just love all the warm and fuzzies.
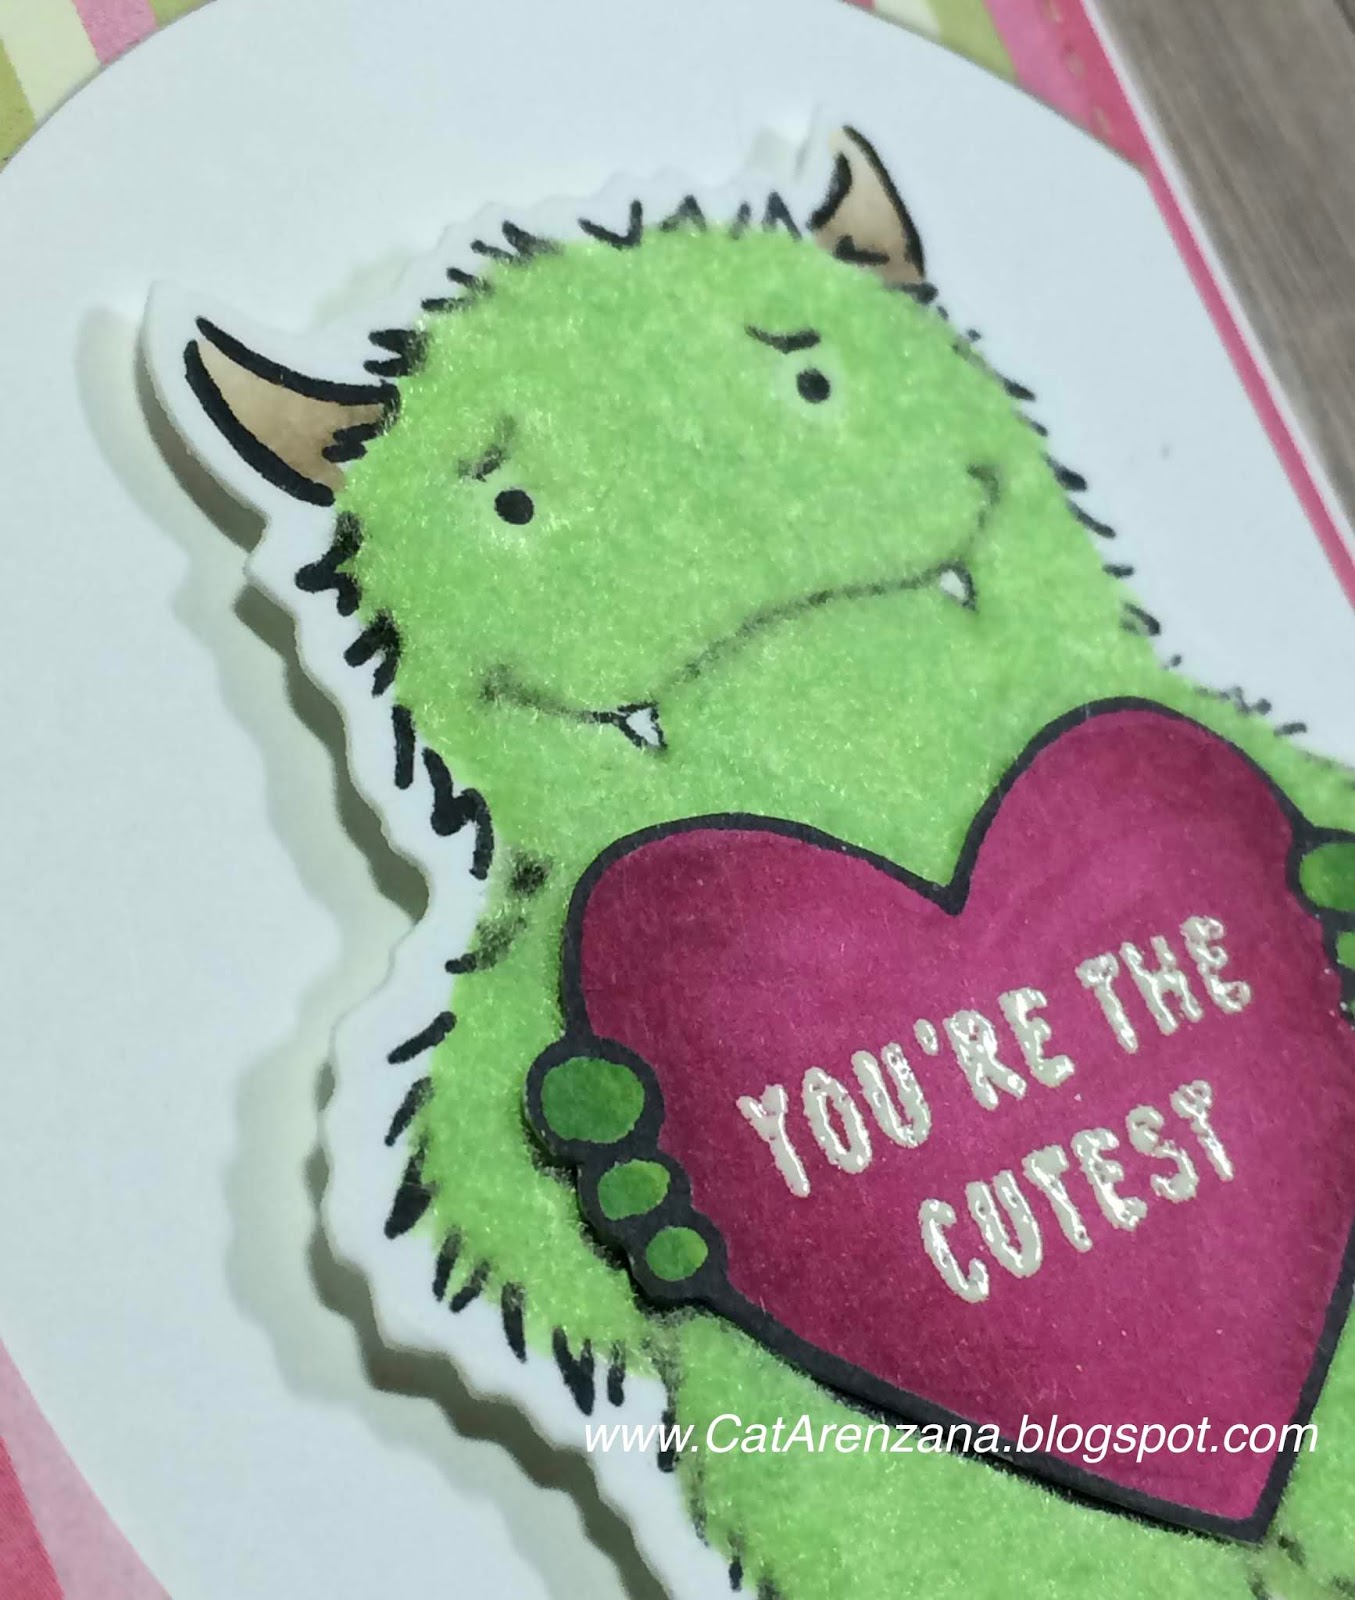
Speaking of fuzzies, you guys. . . I have stuff. Lots of stuff. Stuff that I have had for years. So, when I saw the Monster Love set by Concord and 9th, I squealed with delight. For two reasons, really.
1) There was a similar set available during Stamptember and I missed it. (Insert sad face)
2) When they released Monster Love (insert very happy face), I knew exactly what I wanted to do.
Make.them.fuzzy.
{Supplies used are linked in the text in this post. Compensated affiliate links may be used at no additional cost to you. Thank you for your support!}
And once I started, I kinda couldn't stop. Because, look look look at how cute they are all fuzzy!
Okay . . . back to "stuff" . . . some of the stuff I have in my stash is Fun Flock from Stampendous. And, I have it in a variety of colors. Sadly, when I went to look for a link, they only have white.
So, I consulted with the Google and I found it on eBay. But, it was listed as 3D Nail Decoration.
As in fingernails.
Um, no thank you. Fingernails, in my opinion, should not be fuzzy.
Anywho . . . I'm pretty sure it's the same stuff, so let's move on to the cards (you can click on the images to enlarge them):
There are a few things I want to point out when using this fuzzy stuff:
A stamp positioner will be most helpful. I used a Stamp Platform.
Coloring the image first with a Copic (or any other alcohol) marker that matches the color of the Fuzzy Stuff will ensure that your critter doesn't have any bald spots.
If you have a vent over your work space, you might want to make sure the heat or A/C doesn't kick on.
If you have a window near your table, keep it closed in case there is a sudden gust of wind.
If you have a ceiling fan or table fan, turn them off.
Above all else, do not sneeze or cough anywhere near your project when using this stuff.
Now with all of that being said, here's a video for ya:
I only show the flocking technique once at the very beginning and debated on whether or not to include the other two cards in the video.
But, there is a trick to gluing stuff on top of the Fun Flock, like the pink monster's hand holding the balloon, and I couldn't leave that out.
And well, the blue monster was just too cute, so I couldn't leave him out, either.
Finally, here is a list of all the goodies I used:
. . . because, technically the Hello Lovely stamp set is a layering set. And what I really like about the layers is that they are more of a "messy" watercolor layer than "get them lined up just perfectly" type of layer.
{Supplies used are linked in the text in this post. Compensated affiliate links may be used at no additional cost to you. Thank you for your support!}
And, since I used purple and yellow for my last card, I decided to stick with that color palette for this card, too.
So, I started out by stamping the image using Extreme Black Hybrid ink towards the bottom of a Neenah Solar White panel. From there, I used the layering stamps and one Copic marker to fill in the flowers and leaves.
For the big purple flower, I used Memento LuLu Lavender for the bottom layer, My Favorite Things Wild Wisteria Hybrid ink for the middle layer and Memento Grape Jelly for the top layer. I did stamp off before stamping that top layer because the Grape Jelly is pretty dark.
For the purple bud, I stamped LuLu Lavender, but I didn't think it was quite dark enough, so I stamped right over that with Wild Wisteria.
For the leaves, I used Memento Pear Tart, except for the leafy, sprig-like thing. I just colored those in using YG21.
After all the stamping was done, I ran that through my die cut machine with a stitched rectangle die. I love the look of stitching. . . I know I'll be using the Stitched Rectangle Stax dies a whole bunch!
The "birthday" die is from WPlus9 and the "happy" stamp is from My Favorite Things. To make sure I got the "happy" stamped in the right place. . . well, here's the video for ya:
Then, it was time to put the card together by layering the stamped panel onto a purple panel and then onto a top folding white notecard. I finished it up by adding a few sequins.
Oh, hi! Happy New Year to you! Welp, here we are five days into the new year, and I have a card and video for you.
{Supplies used are linked in the text in this post. Compensated affiliate links may be used at no additional cost to you. Thank you for your support!}
I've had my sights set on the Hello Lovely stamp set for quite some time now. No surprise there. . . it's a huge floral spray and I was chomping at the bit to color it up. But, I didn't want to overwhelm myself, so I just stamped a portion of it in the bottom left corner on to a piece of 80# Neenah Solar White card stock using Extreme Black Hybrid ink.
I also really pushed my own boundaries by using purples and yellows. I tend to struggle with these colors, for whatever reason. Do you have particular colors that you struggle with?
Oh, and I struggle with leaves, too. But I finally figured out a way to make it a bit easier for me, which I share in the video:
After I was done with the coloring, I added a few details with a white gel pen. Then, I trimmed the panel down a bit and used my Stamp Platform to stamp the sentiment using VersaFine Onyx Black ink.
I die cut a piece of purple card stock using my A2 Card Frames and from there, just put the card together. I used a tape runner to adhere the stamped panel to the purple frame and then used foam tape to adhere that to the front of the card.