I stamped the bluebonnets onto X-Press It cardstock with Tuxedo Black Memento ink and colored with my Copics and then I used the coordinating die to cut it out. I stamped a white panel using the Messy Mesh background stamp from Whimsy Stamps and Catherine Pooler Tranquil ink. Then I used the Nested A2 Arches dies from Scrapbook.com to cut out the center of the messy mesh background panel.
Thursday, August 7, 2025
Bluebonnet Hello
I stamped the bluebonnets onto X-Press It cardstock with Tuxedo Black Memento ink and colored with my Copics and then I used the coordinating die to cut it out. I stamped a white panel using the Messy Mesh background stamp from Whimsy Stamps and Catherine Pooler Tranquil ink. Then I used the Nested A2 Arches dies from Scrapbook.com to cut out the center of the messy mesh background panel.
Monday, July 28, 2025
Wish Big Little Monster!
Oh, hi! This monster birthday card was very much inspired by a card I saw on Pinterest created by a member of the Whimsy Stamps Design Team. I especially loved how she used the slimline die.
I started out by ink blending my background and then die cut it using the Slimline Stardust die by Whimsy Stamps. Some of the little stars stayed in place and I liked how that looked, so I left them. Next I colored up the cute little monsters from the Monster Birthday stamp set and I used the coordinating dies to cut out the monsters.
For the words, I used the Wish die from My Favorite Things and the Bold ABC die set from Whimsy Stamps. I cut each of them 3 times; once from X-Press It cardstock, which I colored with Copics, and twice from 100# cardstock to add a little bit of sturdiness.
Next, I adhered the background to my card base and then used foam tape to adhere all the elements. Viola! All done.
Supplies used:
- Tuxedo Black Memento ink
- Lime Rickey, Something Borrowed, and Tiara Catherine Pooler inks
- Slimline Stardust die by Whimsy Stamps
- Monster Birthday stamps and dies by Whimsy Stamps
- Bold ABC dies by Whimsy Stamps
- Wish die by My Favorite Things
Thanks for stopping by!
Wednesday, July 23, 2025
Everyone Loves a Parade!
Oh hi! How are you? It's been a while, I know. And it's not because I haven't been stamping. . . I just haven't been posting. But, I decided that it might be time to resurrect this little blog of mine and I thought a card featuring the super cute stamp set Yankee Doodle Day by Pajama Crafters Stamps would be a good start.
I stamped all the critters and colored them up with my Copics and then cut them out. Yes. By hand. I had an idea for the background, but I didn't want to color all those images and then mess up the background and have to start all over. A girl's gotta do what a girl's gotta do.
Anywho. . . .after I colored up and cut out the images, I worked on the background. My cardstock of choice for Copics is X-Press It, especially when creating backgrounds like this. I just find the markers blend much better (as long as they are nice and full of ink).
Once the background was done, I adhered those cute little critters to the background panel and then adhered that to my card base. Viola! All done!
Supplies used:
- Yankee Doodle Day Stamp Set
- Memento Tuxedo Black ink
- X-Press It Cardstock (for coloring)
- 100# white cardstock for card base
Markers used:
- Raccoon - W0, W2, E42, C7, N6, N4, R20
- Log - E89, E87, E84
- Deer - E37, E35, E41, E40, R20, E49
- Hedgehog - E77, E74, W3, E53, E21, E51
- Eagle - E89, E87, E84, E81, E40, Y26, Y15
- Foxes - E09, YR24, YR23, E42, E41, E49
- Bear - E37, E35, E31, E30, E49
- Horns - Y26, Y21, Y15
- Red, White, & Blue: R29*, R27, R24, W1, W0, B37, B18, B24
- Background - YG17, YG25, YG03, YG01, BG96, E55, E35, E31, E44, B000, B00, B01, BG01
Tuesday, April 26, 2022
HapBee Day! Whimsy Stamps + This Calls for Confetti = CUTE cards!
Oh, hi! I've got a shaker card to share today featuring Whimsy Stamps & This Calls For Confetti. . . and there's a collaboration hop going on over on Instagram, too!
![]() |
| Supplies used are linked in the video post. Compensated affiliate links may be used at no additional cost to you. Thank you for your support! |
You can see how this card came together and all the deets about the hop HERE.
Thanks for visiting today!
Sunday, April 17, 2022
Many Ways to Use a Background Stamp
Oh, hi! Today I'm sharing a fun techniques using the Tropical Floral Background Stamp by Whimsy Stamps. You can see how all of these cards came together here.
![]() |
| Supplies used are linked in the video post. Compensated affiliate links may be used at no additional cost to you. Thank you for your support! |
![]() |
| Supplies used are linked in the video post. Compensated affiliate links may be used at no additional cost to you. Thank you for your support! |
![]() |
| Supplies used are linked in the video post. Compensated affiliate links may be used at no additional cost to you. Thank you for your support! |
![]() |
| Supplies used are linked in the video post. Compensated affiliate links may be used at no additional cost to you. Thank you for your support! |
Thanks for stopping by today!
Friday, April 15, 2022
All Aboard! The Magic of Masking!
Oh, hi! I've got a fun card to share today where I've done masking two different ways! You can see how I did the masking technique here.
![]() |
| Supplies used are linked in the video post. Compensated affiliate links may be used at no additional cost to you. Thank you for your support! |
I chose to fill the train car with hearts, but there are so many possibilities with this one! It can be filled with critters or candy or flowers or . . . just about anything! What would you fill it with?
Thanks for visiting today!
Wednesday, April 13, 2022
Two More Easter Cards
Oh, hi! I've got two more Easter cards to share today. This time I used the wonderful Build A Basket Die Set from Whimsy Stamps.
![]() |
| Supplies used are linked in the video post. Compensated affiliate links may be used at no additional cost to you. Thank you for your support! |
You can see how these cards came together and a full list of supplies used here.
Tuesday, April 12, 2022
Slimline Easter Card
Oh hi! I've got a super cute Easter card to share today! I just love these chubby bunnies from Whimsy Stamps.
![]() |
| Supplies used are linked in the video post. Compensated affiliate links may be used at no additional cost to you. Thank you for your support! |
Click here to see how I created this card and list of supplies used.
Thanks for stopping by today!
Sunday, September 12, 2021
Whimsy Stamps Just Chicken In - STAMPtember 2021 Exclusive
Oh, hi! I'm super excited to share Whimsy Stamps STAMPtember Exclusive Stamp & Die Set!
Now, I gotta let you know right now that this is limited edition, and once they're gone, they are gone. . .sooooo, hurry! hurry! Get yours today!
You can grab the Just Chicken In stamp set HERE . . . or . . . grab the Just Chicken In stamp set and coordinating dies HERE.
This super cute set just makes me smile. And it can be used for just about anything!
For my first card, I randomly stamped the little chicks, but decided to color around the chicks to have some good contrast. I colored up the rooster and used the coordinating die to cut him out and popped him up with some foam tape on a die-cut hexagon. The patterned paper is from the Slimline Buttercup Paper Pack. I thought the gingham pattern with little flowers was perfect for this card.
![]() |
| Supplies used are linked in the text in this post. Compensated affiliate links may be used at no additional cost to you. Thank you for your support!} |
For my second card, I stamped and colored up all the chickens and cut them out with the coordinating dies. I used the Slimline Cornered Rectangles Die set to create a frame, and used another piece of cardstock from the Slimline Buttercup Paper Pack . . because well. . .it just works so well with these stamps!
Whimsy Stamps Just Chicken In Stamps & Dies
Whimsy Stamps Slimline Buttercup paper Pack
Whimsy Stamps Nested Hexagon Die Set
Whimsy Stamps Slimline Cornered Rectangles Die Set
Whimsy Stamps Simple Sentiments Die Set
Copics Used:
Rooster - R59, R56, YR27, YR24, YR23, E42, E41, E40
Chicken - R59, R56, YR23, Y32, YR21
Chicks - Y19, Y15, Y08, YR68
Nest - YR27, YR24, YR23, Y21
Eggs - E42, E41, E40
Background - B34
Thanks for stopping by today!
Monday, July 19, 2021
Shark Fest - Just Chillin'
Oh, hi! Are you a fan of shark week? I'm not . . . BUT . . .I am a fan of these sharks from the new Shark Fest stamp set by Whimsy Stamps.
Seriously . .. just look at this guy chillin' in a hot tub!
![]() |
| Supplies used are linked in the text in this post. Compensated affiliate links may be used at no additional cost to you. Thank you for your support!} |
I started out by stamping the Tropical Floral background with All That Jazz ink onto a piece of turquoise cardstock.
Next, I die-cut a circle from white cardstock and did a bit of ink blending with Tiara, Tiki Torch, and Pucker Up inks.
I stamped the shark and the palm tree using Memento Tuxedo Black ink onto a piece of Cougar Super Smooth cardstock and colored them up with my Copics. Then I had my Brother Scan n Cut machine cut them out.
I adhered the circle to the background panel and the palm tree on top of that. Next I added a bunch of foam tape to the shark and adhered him in place.
To finish it up, I stamped the sentiment using VersaFine Onyx Black ink above the shark and Viola! All done!
Supplies used:

Catherine Pooler All that Jazz Ink
Catherine Pooler Tiki Torch Ink
Catherine Pooler Pucker Up Ink
Thanks for stopping by today!
Monday, July 12, 2021
Whimsy Stamps Under the Sea
Oh, hi! I've got three cards to share today! Once I started playing with the new Under the Stamp Set by Whimsy Stamps, I just couldn't stop! (all supplies, including the Copics I used, are listed below)
My first card is. . . a slimline shaker, of course! And the Slimline Under the Sea paper pack is a perfect match!
![]() |
| Supplies used are linked in the text in this post. Compensated affiliate links may be used at no additional cost to you. Thank you for your support!} |
My second card is another slimline using the Slimline Connected Rectangles Die and another piece of cardstock from the Under the Sea Paper Pack.
I cut down the patterned paper so it would fit perfectly behind the large rectangles. I love how this turned out!
And for my third card. . . it's a little punny! Those little shrimp are soooo stinkin' cute and the sentiment made me giggle a little bit:
Supplies used:
Whimsy Stamps Under the Sea Stamp Set
Whimsy Stamps Slimline Under the Sea Paper Pack
Whimsy Stamps Slimline Card Builder Die
Whimsy Stamps Slimline Connected Rectangles Die
Whimsy Stamps Wonky Stitched Rectangle Dies
Whimsy Stamps Stitched & Pierced Circle Dies
Copics Used:
Seahorse - BG57, BG34, BG32, BG11, BG09, E42, E41
Turtle - YG17, YG23, YG01, YG03, E57, E34, E31, E42, E41
Stingray - V06, V05, V01, RV63
Hermit Crab - B32, R17, R08, R05, YR12, BG72, BG70, B000, N2, BG0000
Puffer Fish - BG70, YR65, YR20, YR00, YR31, E43, E42, E41, E95, R12, YR02
Shrimp - R22, R01, R00
Thanks for stopping by today!
Hey, You! Yes, You! YOU Are Awesome!
Oh, hi! I just wanted to let you know that . . . YOU are awesome!
![]() |
| Supplies used are linked in the text in this post. Compensated affiliate links may be used at no additional cost to you. Thank you for your support!} |
When I first saw this bear from the On A Roll stamp set, I knew exactly what I wanted to do. I wanted a really bright and cheery background, so I started out by using Orange Glow Neon Glitz Gel with the Speckled Star stencil.
While that panel was drying, I colored up that little bear with my Copics (colors listed below) and then ran him through my Scan n Cut. I stamped and embossed the sentiment "You Are" and then die-cut it with the Simple Sentiment die set.
Next, I die-cut the word "Awesome" three times from navy blue cardstock and stacked them up for added dimension.
Once my stenciled panel was dry, I ran it through my Gemini, Jr. with a Wonky Stitched Rectangle Die and adhered it to a navy blue card base. I used liquid glue to adhere the sentiment strip and die-cut word and added foam tape to the bear and, Viola! All done!
Supplies used:
Whimsy Stamps On A Roll Stamp Set
Whimsy Stamps Speckled Star Stencil
Whimsy Stamps Awesome Word Die
Whimsy Stamps Wonky Stitched Rectangle Die Set
Neenah Classic Crest Cardstock
Copics Used:
Bear - W3, W2, W1, W0, R20
Skateboard - B32, R17, YR04, Y08, N3, B18, B24, B23
Wheels - C5, BV29, BV25, C3
Thanks for stopping by today!
Sunday, July 11, 2021
The Pretty Card
Oh, hi! Here's my third card using the Animal Tiles stamp set. If you missed the first two, you can see them here and here.
![]() |
| Supplies used are linked in the text in this post. Compensated affiliate links may be used at no additional cost to you. Thank you for your support!} |
For this card, I started out by using the Teardrop Splash stencil with Cummerbund ink for my background. Then I die-cut that panel using the Wonky Stitched Rectangle Die Set and adhered it to the front of a top folding notecard.
Next, I stamped the lily pad and the lotus flower three times each onto Cougar Super Smooth cardstock and then colored them up with Copics.
I trimmed them down and arranged them on the front of the card. Then I decided to add a strip of turquoise cardstock on the left side. After I adhered that strip of cardstock, I adhered the stamped and colored images to the front using foam squares.
I stamped and heat embossed the sentiment using the Simple Sentiments stamp set and used the coordinating die to cut it out. I adhered that to the card front with foam tape as well, and Viola! All done!
Supplies used:
Whimsy Stamps Animal Tiles Stamp Set
Whimsy Stamps Teardrop Splash Stencil
Whimsy Stamps Simple Sentiments Stamp Set
Whimsy Stamps Simple Sentiments Die Set
Whimsy Stamps Wonky Stitched Rectangle Die Set
Tuesday, July 6, 2021
Animal Tiles - Card 2
Oh, hi! So, in my last post I shared a card using the super cute frog from the Animal Tiles stamp set. Today, I'm sharing another card using the same set, but this one has a more masculine feel to it.
![]() |
| Supplies used are linked in the text in this post. Compensated affiliate links may be used at no additional cost to you. Thank you for your support!} |
I absolutely love how versatile this set is . . . the images range from cute to masculine to pretty (which I'll be sharing a pretty card later).
Anywhooooo..... for this card I stamped the Koi fish in Versamark ink and heat embossed the images with gold embossing powder. Then I used my Zig Clean Color Brush markers to color them in. I also colored around the fish with a light blue pen for a watery look.
I cut the images down and rounded the corners. Next I adhered them to some gold glitter cardstock that I had cut to be just slightly larger, and also rounded the corners.
For the background, I ran a piece of navy cardstock through my Gemini Jr. with one of the Slimline Cornered Rectangles dies. After that, I used the Slimline Scribbles background stamp and stamped it using Juniper Mist ink, and then again with Unicorn White ink.
I stamped Especially for You from the Simple Sentiments stamp set and used the coordinating die to cut it out.
I adhered the navy panel to a piece of light blue cardstock that measure 3.25" x 8.25" and then adhered that to my card base, which measures 3.5" x 8.5".
I added foam tape to the back of the Koi fish and the sentiment and adhered those to the front of the card, and Viola! All done!
Thanks for visiting today!
Supplies Used:
Whimsy Stamps Slimline Scribbles Background stamp
Whimsy Stamps Simple Sentiments
Whimsy Stamps Simple Sentiments Die Set
Whimsy Stamps Slimline Cornered Rectangles Die Set
Strathmore Watercolor Card Stock
Catherine Pooler Juniper Mist Ink
Zig Clean Color Brush Markers - Scarlet Red, Pale Orange and Haze Blue
Thursday, July 1, 2021
Hoppy Birthday to You!
Oh, hi! I think this little frog from the Animal Tiles stamps set by Whimsy Stamps is ever.so.cute! And he also pairs quite nicely with the Cutie Alphabet die set . . .and the Scallop Circle Frame die set, too.
![]() |
| Supplies used are linked in the text in this post.
Compensated affiliate links may be used at no additional cost to you.
Thank you for your support!}
|
Friday, June 11, 2021
It's a Good Day . . .
Oh, hi! Have you seen the new Cutie Alphabet Die Set by Whimsy Stamps?? I just love how whimsical it is . . and I think it pairs quite nicely with the new Scribbles Background Stamp, too!
![]() |
| Supplies used are linked in the text in this post. Compensated affiliate links may be used at no additional cost to you. Thank you for your support!} |
I started out by stamping the Scribbles Background onto a piece of Cougar Super Smooth cardstock with Versamark ink. Then I covered it with Detail White Embossing Powder and heat set it with my heat tool.
Next, I did a bit of ink blending using make-up brushes with Catherine Pooler inks in Sweet Sixteen, It's a Boy, Garden Party, Limoncello, Bellini, and It's a Girl.
Next I ran my ink blended panel through my Gemini, Jr with the new Slimline Cornered Rectangle Dies.
I die-cut the words using the Cutie Alphabet Die Set and used foam tape to adhere them to my ink blended panel. I adhered that to a piece of black cardstock, and then adhered that to the front of my card base. Ta-Da! All done!
Supplies used:
Whimsy Stamps Scribbles Background Stamp
Whimsy Stamps Slimline Cornered Rectangles Die Set
Whimsy Stamps Cutie Alphabet Die Set
Catherine Pooler Sweet Sixteen Ink
Catherine Pooler It's a Boy Ink
Catherine Pooler Garden Party Ink
Catherine Pooler Limoncello Ink
Catherine Pooler It's a Girl Ink
Thanks for stopping by today!
Thursday, June 10, 2021
Mooooooo's Having a Birthday?!
Oh, hi! Today I'm sharing a slimline card using the new 6x6 Bandana Paper Pack, along with a few other goodies. I don't know about you . . .but I am loving all the farm goodies from Whimsy Stamps' latest release!
![]() |
| Supplies used are linked in the text in this post. Compensated affiliate links may be used at no additional cost to you. Thank you for your support!} |
Next, I cut a piece of patterned paper from the Bandana Paper Pack. . .Pink for me, please! Because a pink bandana and a bunch of birthday cows go together like peanut butter and jelly!
Well. . . actually, I cut two pieces to make it work for my slimline card. The first piece is cut to 3" x 6" and the second piece is cut to 3" x 2". I also cut a piece of black cardstock to 3.25" x 8.25" so I could have a little border around the bandana paper.
Next, I colored up the super cute cows from the Cow Party Stamp Set and then cut them down so I could adhere them to black cardstock so there would be a small border around them, too.
Copics used:
Nose: E04, E11, E00, E000
Body: W2, E41, E40
Spots: YR24, BV29, BV25
Horns: E43, E42
Hooves: YR24, BV29, C5, C3
Balloon: YG25, YG23, YG01
Party Hats: YG25, YG23, YG01, RV34, R83, RV11
Cake: Y21, Y23
Frosting: RV34, R83, RV 11
Candles: YG23, YG01, YR04, Y08
Background: BG0000, YG17, YG03
To put my card together, I adhered the Scratchy Plaid piece to a piece of black cardstock that measures 2.5" x 6.5".
I adhered the Bandana paper to the black cardstock and then adhered the Scratchy Plaid background on top, making sure it was centered.
Next I adhered the cows to the black squares and added some foam squares to the back of that and adhered it to the Scratchy Plaid panel. I offset them from center just a little bit.
Then I adhered the whole panel to the front of a white notecard that measures 3.5" x 8.5" and that finishes up my card!
Thanks for stopping by today!
Supplies used:


Thursday, May 20, 2021
Fish Fancy Slimline Card
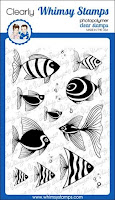
Oh, hi! Aren't these fancy fish from the Fish Fancy stamp set by Whimsy Stamps sooooo. . . well . . . Fancy?!? I love how some of the fish are solid and some are open line so they can be colored.
![]() |
| Supplies used are linked in the text in this post. Compensated affiliate links may be used at no additional cost to you. Thank you for your support!} |
For this card, I started out by embossing a piece of white card stock with the Slimline Wave Lengths Embossing Folder and then I did ink blending with Tumbled Glass and Cracked Pistachio Distress Oxide inks. Then I added some splatter using my white Zig Cartoonist pen.
Next, I die-cut a piece of white card stock using the Slimline Swiss Dots die and splattered Tumbled Glass and Cracked Pistachio inks over the front of that. Then I adhered that to my embossed panel, and then adhered that to the front of my card base.
I stamped the fish using Memento Tuxedo Black ink onto Cougar Super Smooth card stock and colored them up with my Copics. Then I ran them through my Brother Scan N' Cut to cut them out.
I adhered the fish with liquid glue to the front of the card and finished it up with a sentiment from the Best Fishes Sentiments stamp set and some sequins.
Thanks for stopping by today!