About Me

Tuesday, December 8, 2020

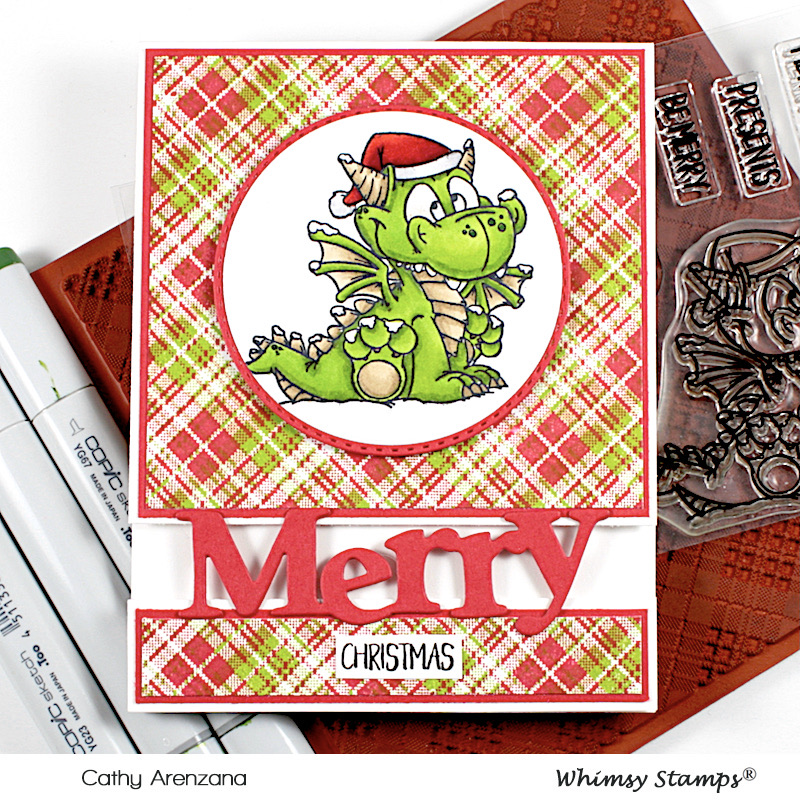
Whimsy Stamps Dragon Christmas Wishes Gap Card

Oh, hi! I'm over on the Whimsy Stamps YouTube channel today sharing how to create a "gap" card . . . plus, I double stamped the Tartan Plaid background stamp to get an entirely different look. Click here to check out the video.


{Supplies used are linked in the text in this post. Compensated affiliate links may be used at no additional cost to you. Thank you for your support!}


Thanks for stopping by today!

Monday, December 7, 2020

Whimsy Stamps Magical Winter

 Oh, hi! This bookmark die from Whimsy Stamps was perfect to create a skinny scene on my slimline card! You can see how this card came together in the video.


{Supplies used are linked in the text in this post. Compensated affiliate links may be used at no additional cost to you. Thank you for your support!}

Thanks for stopping by today!

Friday, November 20, 2020

Whimsy Stamps Twinkle Scribble Circle & Snowy Watermill. . .

 Oh, hi! Have you seen the new Twinkle Scribble Circle die by Whimsy Stamps?? It's so delicate and pretty! And look look look how it frames the Snowy Watermill stamp!


{Supplies used are linked in the text in this post. Compensated affiliate links may be used at no additional cost to you. Thank you for your support!}

This card came together pretty quickly, too! I started by stenciling white ink with the Polka Dot stencil onto a piece of blue card stock and then I die-cut that panel with a Wonky Stitched Rectangle die. I adhered that to a piece of light tan card stock and then adhered that to the front of a top folding A2 sized notecard.

Next, I stamped the Snowy Watermill stamp on to a piece of white card stock with Stone Blue ink and die cut it using a Pierced & Stitched circle die. I used a make up blending brush with the same Stone Blue ink and added just a touch of color around the edge of the circle and then adhered that to the front of the card.

Then, I ran the Twinkle Scribble Circle die through my Gemini, Jr. with some silver glitter paper and adhered that on top of the Snowy Watermill.

To finish up my card, I stamped "Season's Greetings" from the Holiday Mini Sentiments set and used the stitched fish tail banner die from the Quick Strips die set to cut it . . and Viola! All done!


Supplies Used:

Twinkle Scribble Circle Die

Snowy Watermill Cling Stamp

Holiday Mini Sentiments Stamp Set

Polka Dot Stencil

Wonky Stitched Rectangles Die Set

Pierced & Stitched Circle Die Set

Quick Strips Die Set

Catherine Pooler Stone Blue Ink

Hero Arts Unicorn Pigment Ink


Thanks for visiting today!


Tuesday, November 17, 2020

Whimsy Stamps Jingle All the Way - Side Step Card

 Oh hi! I'm over on the Whimsy Stamps YouTube Channel today sharing how to create a Side-Step card using the super cute Jingle All the Way stamp set.


{Supplies used are linked in the text in this post. Compensated affiliate links may be used at no additional cost to you. Thank you for your support!}


Supplies Used:

Whimsy Stamps Jingle All the Way Stamp Set

Whimsy Stamps Slimline Hill House Die

Whimsy Stamps Tree Assortment Die Set

Whimsy Stamps Stitched Border Trio Die Set

Whimsy Stamps Blurry Flurries Paper Pack

Neenah 80# Solar White Cardstock

Cougar Super Smooth Cardstock

Memento Tuxedo Black Ink

Copic Markers

Frosted Lace Stickles

Wink of Stella Glitter Pen

Nuvo Crystal Glaze

Nuvo Deluxe Adhesive

Fiskar's Paper Trimmer

Scoreboard

Brother Scan N' Cut

Measurements:

Card Base 5 1/2" x 8 1/2"

After cutting the slit in the card, score at 4 1/4" on the 2 1/2" section.

On the 3" section, score at 1", 2", 3 1/4", 4 1/2", and 6 1/2"


Copics Used:

Tree - B34, G09, YG17, YG13, E27, E35

Wagon - R29, R27, C7, C5, C3, C1

Skin - E13, E21, E51

Elf Hat - B34, G09, YG17, YG13, R29, R27, R24

Elf Outfit - R29, R27, YG13

Boots - C5

Bells - Y26, Y38, Y08


Thanks for visiting today!

10