About Me

Thursday, May 20, 2021

Fish Fancy Slimline Card

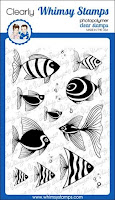
Oh, hi! Aren't these fancy fish from the Fish Fancy stamp set by Whimsy Stamps sooooo. . . well . . . Fancy?!? I love how some of the fish are solid and some are open line so they can be colored.

Supplies used are linked in the text in this post. Compensated affiliate links may be used at no additional cost to you. Thank you for your support!}

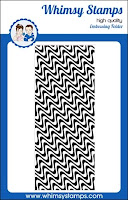
For this card, I started out by embossing a piece of white card stock with the Slimline Wave Lengths Embossing Folder and then I did ink blending with Tumbled Glass and Cracked Pistachio Distress Oxide inks. Then I added some splatter using my white Zig Cartoonist pen.

Next, I die-cut a piece of white card stock using the Slimline Swiss Dots die and splattered Tumbled Glass and Cracked Pistachio inks over the front of that. Then I adhered that to my embossed panel, and then adhered that to the front of my card base.

I stamped the fish using Memento Tuxedo Black ink onto Cougar Super Smooth card stock and colored them up with my Copics. Then I ran them through my Brother Scan N' Cut to cut them out.

I adhered the fish with liquid glue to the front of the card and finished it up with a sentiment from the Best Fishes Sentiments stamp set and some sequins.

Thanks for stopping by today!


Saturday, May 1, 2021

Sometimes, You Just Gotta Color...

Oh, hi! The new Gerbera Daisy stamp & die set by Whimsy Stamps just made my heart flutter! I couldn't wait to sit down and color it . . . so I did . .. three times . . . three different ways.

For my first card, I reached for my trusty Copics (colors used are listed below). I've been practicing underpainting and I love how this turned out.

Supplies used are linked in the text in this post. Compensated affiliate links may be used at no additional cost to you. Thank you for your support!}
For my second card, I thought I'd try out my new Zig Clean Color Brush Markers (colors used are listed below). Watercoloring is not one of my strengths, but I thought I'd give it a shot . . .I figured I could do "loose" watercoloring to warm up a bit. The colors are much softer, but I really like how this turned out, too . .. especially because I usually struggle with watercolor.


For my third card, I decided to only color some of the flowers . . . because you don't always have to color everything. And, I used my Zigs for this card, too. I wasn't too sure how the silver embossing would look, but I was pleasantly surprised.

I also used the coordinating border die to cut up along the top of the flowers, and to add some texture, I stamped the Tartan Plaid background stamp onto pink paper with Hero Arts Unicorn White Pigment Ink.

And. . .since I embossed the image in silver, I thought a silver frame around the sentiment would tie it all together.


Supplies used:


Copics used:

Sky - BG000
Purple Flowers - BV02, BV00, B60
Tall Purple Flowers - B63, B66, B60, BV31
Red Flowers - R17, R14, R02, underpainted with B32
Peach Flowers - YR02, E95, YR00, E99, Y19, Y08, Y06, underpainted with B00
Yellow Flowers - Y19, Y08, Y06, underpainted with BV000
Leaves - BG75, BG72, YG61, BG90, YG67, YG17, G24, YG63
Berries - BG72, BG90

Zig Brush Markers used:

Pink, Orange, Yellow, Light Green, Persian Green, Light Violet, Pale Violet, Shadow Mauve, English Lavender, Light Brown, Pale Gray

Zig Brush Markers used on silver embossed flowers:

Pink, Yellow

Thanks for stopping by today!

Monday, April 19, 2021

Whimsy Stamps Build a Castle Die Set

Oh, hi! I'm so excited about this one that I don't even know where to start! You guys!! The Build a Castle Die Set from Whimsy Stamps is soooooooooo awesome! And it can be used soooooo many different ways!

For this card, I decided to create a castle that would fill up the entire front of my slimline card. I die-cut the main castle pieces from Barely Grey cardstock, the trim, turrets, flags and banner from Blu Raspberry cardstock, the wall from Real Grey cardstock and the dragons from Smoke Grey cardstock.

Supplies used are linked in the text in this post. Compensated affiliate links may be used at no additional cost to you. Thank you for your support!}


After I adhered all my castle pieces together, I adhered that to a piece of patterned paper from the Slimline Enchanted Kingdom paper pack and then adhered the dragons, and finally adhered that to my card base, which is made from Pure White cardstock. Ta-da! All done!

But wait! Not all castles have to be grey! After all . . .I think unicorns would have a PINK castle! So I die-cut the castle this time using Cotton Candy cardstock for the main castle and Razzleberry for the turrets, trim, flag and banner.


I die-cut the Slimline Cloud die from Pure White cardstock and adhered that to a Pink Lemonade card base. Next I adhered my castle and added two more clouds to the bottom of the castle.

I colored up those sweet unicorns from the Unicorn Wishes stamp set and cut them out using my Brother Scan N Cut and adhered them using foam tape. Viola! All done.

Oh . . but wait. . .here comes the darker side of things . . . . and I didn't even use the any of the castle dies for this one. . . I only used the border die and the dragons.


I did add some texture to the "wall" using the Brick Pattern stencil and for the sky, I used Speckled Egg, Chipped Sapphire and Crackling Campfire Distress Oxide inks. To create the clouds, I just "swooshed" a wet paint brush in random spots. . .I added some splatter using my white Zig Brush Pen and BOOM! All done!

So . .. there ya have it! Three very different ways to use the Build a Castle Die Set . . .and don't be surprised if you happen to see a card with a purple and silver castle inhabited by fairies . . . .

Supplies used:


Thanks for stopping by today!

Saturday, April 10, 2021

Yappy Birthday!

Oh, hi! I've got a slimline card to share today using the new Slim Line Zig Zag Edger Dies by Whimsy Stamps. I think they paired perfectly with the Slimline Black & White Dog paper pack and the Wrinkles stamp set.

Supplies used are linked in the text in this post. Compensated affiliate links may be used at no additional cost to you. Thank you for your support!}

I started out by stamping and coloring the super cute little pugs with my Copics (colors used are listed below). Then I cut them out with the Pierced and Stitched Circle dies and adhered them to circles die cut from black cardstock.

Next I created a card base using Wild Cherry cardstock (which, in my opinion is the best red cardstock). My card base measures 8.5" x 3.5".

I adhered a piece of patterned paper from the Slimline Black & White Dog paper pack to the front of my card base.

I used one of the dies from the new Slim Line Zig Zag Edger Dies and cut another piece from the Black and White Dog paper, and then cut two more pieces from Wild Cherry cardstock.

I adhered all of those to the card base, used a bit of foam tape on the back of the circles and Viola! All done!

Supplies used:

Whimsy Stamps Slimline Zig Zag Edger Dies

Pierced & Stitched Circle Dies

Wrinkles Stamp Set

Slimline Black & White Dog Paper


Copics Used:

W6, W4, E43, E42, E41, R20, R27, R59, Y17, C3, C1, C0


Thanks for visiting today!

10