Anywho, on to the cards.
Here's Card #3:
 |
| {Supplies used are linked in the text in this post. Compensated affiliate links may be used at no additional cost to you. Thank you for your support!} |
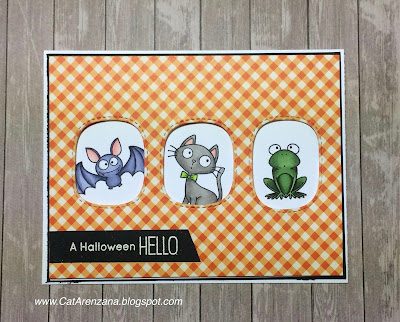
I colored them in with these Copics:
Bat - BV20, BV23, BV25, BV29, R00, R20
Cat - W1, W2, W3, W4; Bowtie - YG13, YG17
Frog - G99, G94, G82, G40
I stamped the sentiment in Memento Luxe Wedding Dress ink and heat embossed with white embossing power.
I used the same window die to cut the patterned paper, and adhered that over the stamped images using an incredible amount of foam tape. I adhered the sentiment using Tombow Multi Mono Liquid Glue.
Then I adhered that to a piece of black card stock measuring 4 1/8" x 5 3/8" and finally adhered that to a white A2 card. Ta-da! All done!
So, Card #4. You guys, this was seriously a hot mess. Not at first, but boy oh boy, I sure did have a few issues with this one towards the end. This card right here is further proof that pretty much anything can be fixed.
I started out by tracing a rectangle using one of the A2 Scallop Frame dies from Honey Bee Stamps so I would know where to stamp the kitty and pumpkins. I used a stamp positioner to get them in just the right spot. . .and I did a bit of masking too so the kitty would be in front of the pumpkins.
Once all the stamping was done, I covered them up with masks and used Distress Oxide inks to create the night sky. I used Black Soot, Faded Jeans, Seedless Preserves and Peeled Paint.
For the clouds, I just scribbled on some clean water. I do love how the Distress Oxide inks react with water.
After all the ink blending was done, I colored in the images using these Copics:
Kitty - W2, W3, W4, R00, R20; Bowtie - YG13, YG17
Pumpkins - YR27, YR15, YR12; Stems - G99, G94
Moon - Y11, Y13, Y15
And this about where things start to go awry . . . so, here's the video so you can see my struggles and how I fixed them.
If you missed the first video, you can see it here . .. and check back soon for the third and final video featuring this stamp set.
Thanks for stopping by today!


No comments:
Post a Comment