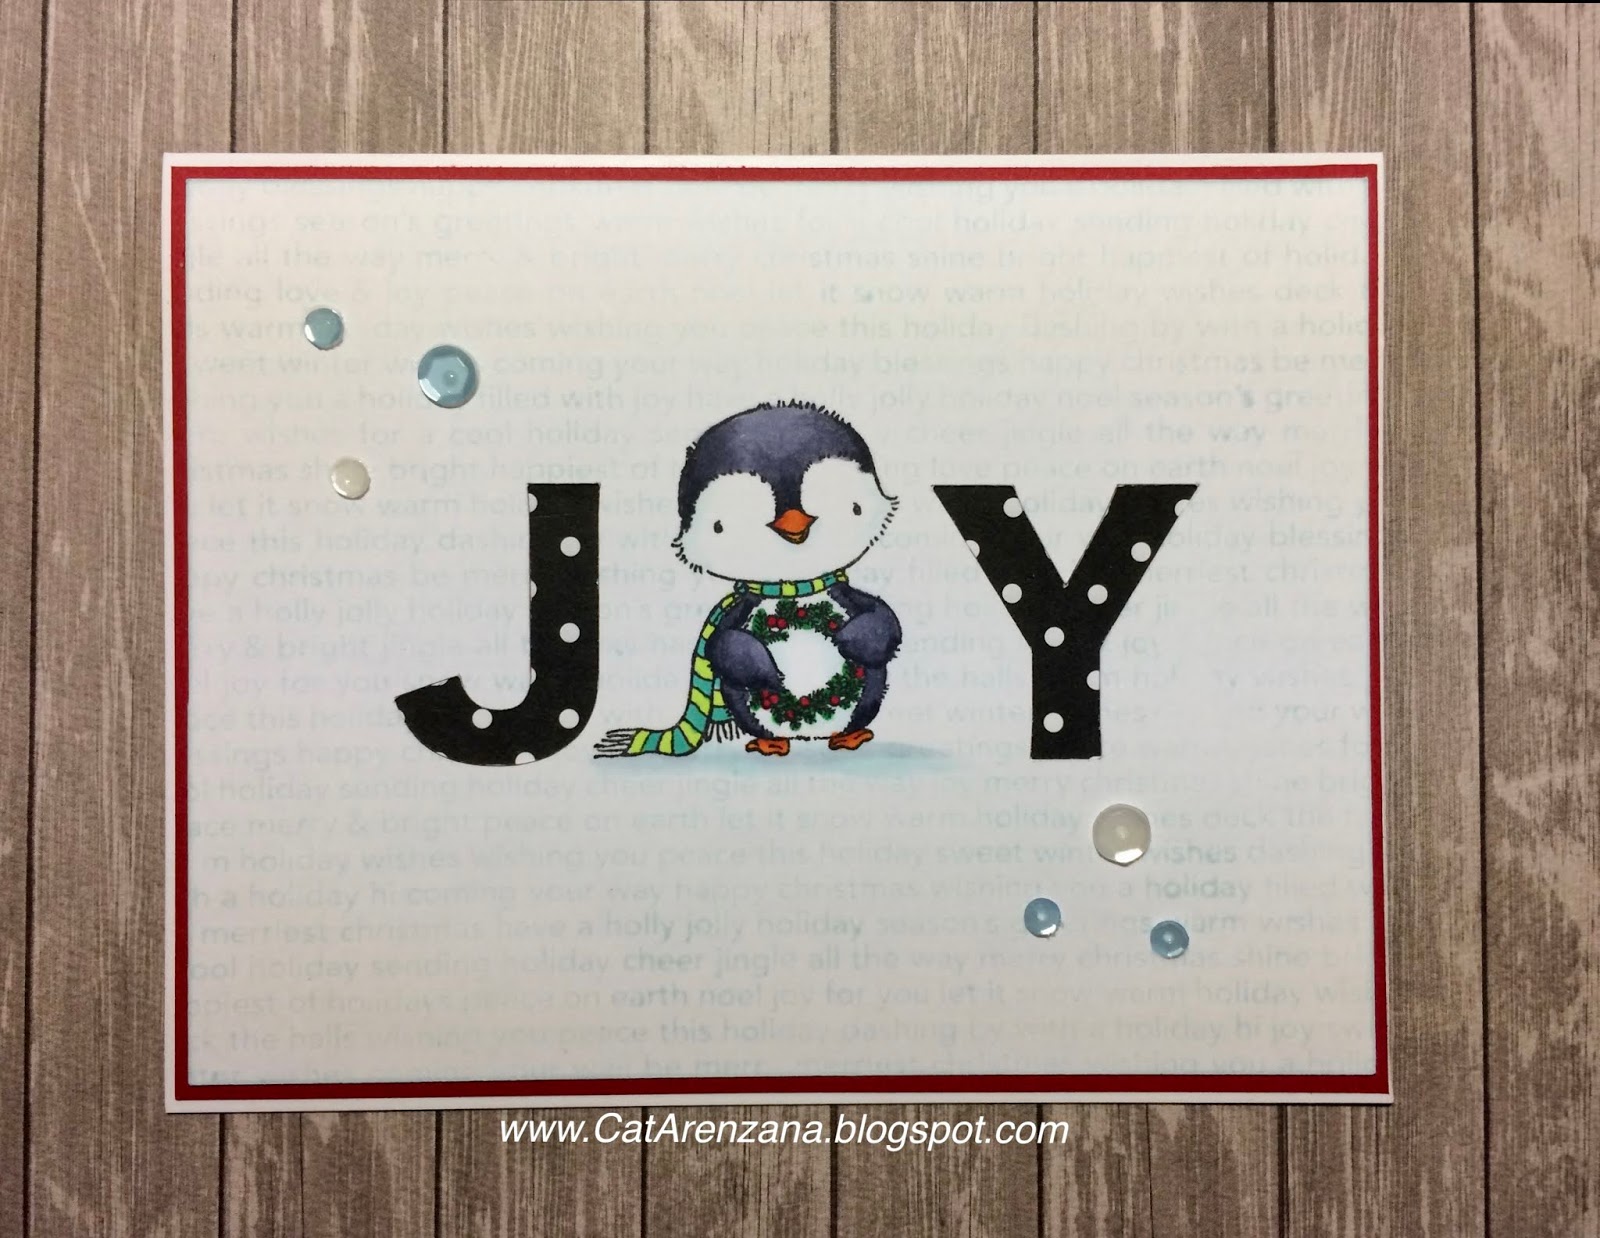
Oh, hi! Whew, I went straight from Halloween cards to a Christmas card. Which is unusual, because I do make Thanksgiving cards every year. But when these little penguins showed up at my door, I just had to whip up a quick card because, well . . . they are just too cute!
{Supplies used are linked in the text in this post. Compensated affiliate links may be used at no additional cost to you. Thank you for your support!}
So, I love the look of inlay die-cuts, but I don't have any alphabet dies, so for this card I used my Cricut to get that look. I even show you how I did it in the video:
So, after I cut out the letters, I used my stamp positioner to get that little guy in just the right place. He's from the Sweet Holiday Penguins set by My Favorite Things. Then I colored him up with the following Copics:
Penguin - BV29. BV25, BV23
Beak and Feet - YR15, YR18
Shading on his face and belly - BG0000
Wreath - G09, R29
Scarf - YG01, BG13
Ground - BG0000, C1
After I was done coloring, I decided it needed a background. So, I cut out a mask for the penguin and stamped the Christmas Background stamp in Sno-Cone Hybrid ink. It added just enough.
I adhered the stamped panel to a red panel and then adhered that to a white A2 notecard. I couldn't decide on whether or not to use the polka dot letters at first, but in the end, I'm glad I decided to use them.
Final step was to add a few sequins and Viola! All done!
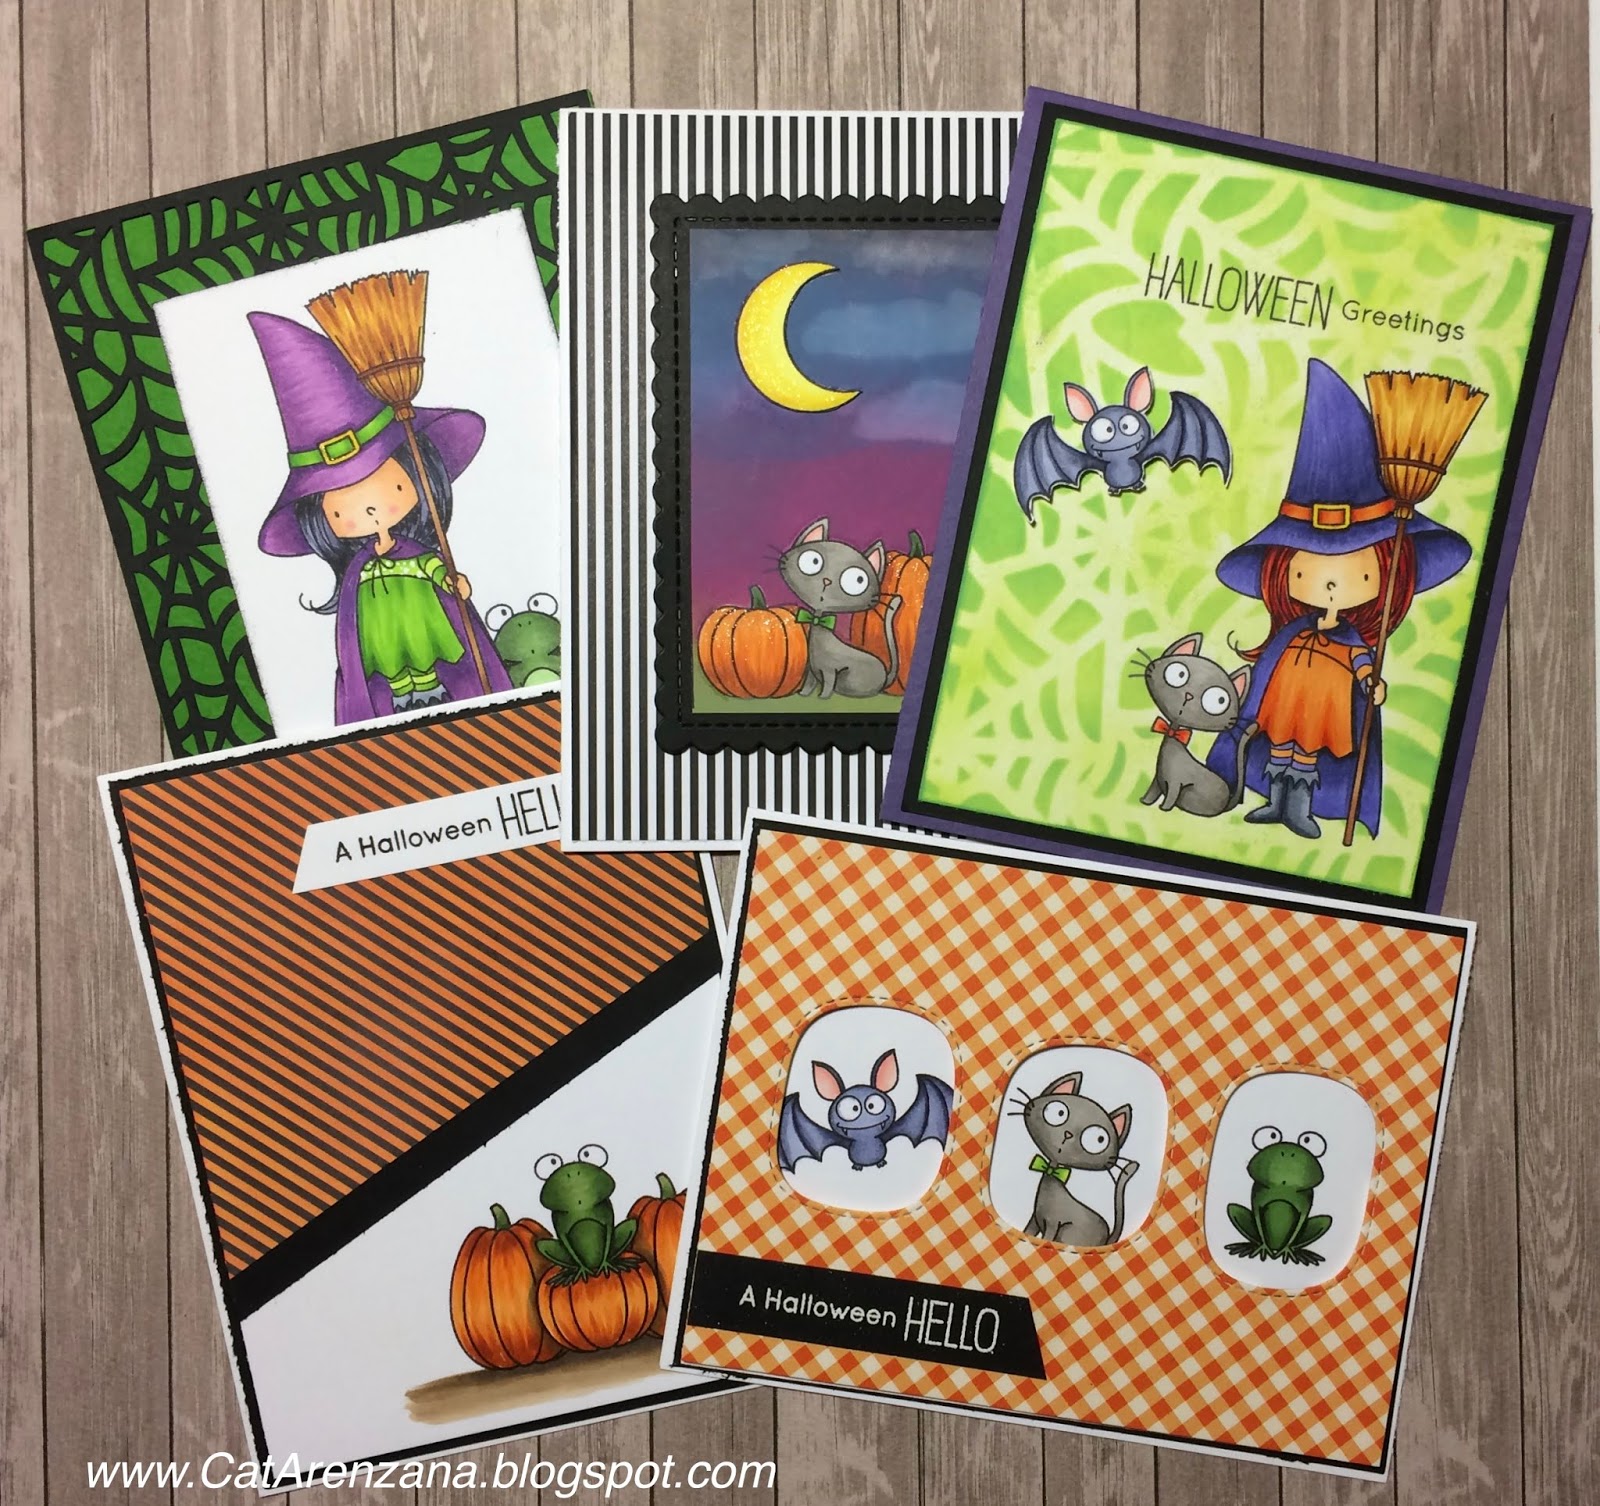
Welp... here's the fifth and final card in my Witch Way is the Candy Halloween Series. I really enjoyed using this set and creating videos. I hope you enjoyed them, too.
{Supplies used are linked in the text in this post. Compensated affiliate links may be used at no additional cost to you. Thank you for your support!}
For this card, I started out by stamping the kitty and witch from the Witch Way is the Candy stamp set onto a piece of 80# Neenah card stock measuring 4. 25" x 5.5" using Memento Tuxedo Black ink.
Then I masked the images and very lightly added a layer of Twisted Citron Distress Oxide ink using a sponge. Then I taped the stencil down and used an ink blending tool with Twisted Citron and Mowed Lawn Distress Oxide Ink.
After all the coloring was done, I trimmed down the stamped panel a bit and adhered it to a piece of black card stock and then finally, added that to a top folding purple A2 card.
Oh, hi! I'm back with the next two cards featuring the Witch Way is the Candy stamp set. Card # 3 went pretty smoothly, however, Card #4 was a challenge . . . I tried to use a ruler. Really, I should know better than that. . .they don't like me . . . which you can see in the video at the end of this post.
Anywho, on to the cards.
Here's Card #3:
{Supplies used are linked in the text in this post. Compensated affiliate links may be used at no additional cost to you. Thank you for your support!}
This one is pretty straight forward. I traced the windows from the Stitched Triple Peek-a-Boo Windows die onto a piece of 80# Neenah card stock measuring 4" x 5.25". Then I stamped the images using Memento Tuxedo Black ink from the Witch Way is the Candy stamp set.
I stamped the sentiment in Memento Luxe Wedding Dress ink and heat embossed with white embossing power.
I used the same window die to cut the patterned paper, and adhered that over the stamped images using an incredible amount of foam tape. I adhered the sentiment using Tombow Multi Mono Liquid Glue.
Then I adhered that to a piece of black card stock measuring 4 1/8" x 5 3/8" and finally adhered that to a white A2 card. Ta-da! All done!
So, Card #4. You guys, this was seriously a hot mess. Not at first, but boy oh boy, I sure did have a few issues with this one towards the end. This card right here is further proof that pretty much anything can be fixed.
I started out by tracing a rectangle using one of the A2 Scallop Frame dies from Honey Bee Stamps so I would know where to stamp the kitty and pumpkins. I used a stamp positioner to get them in just the right spot. . .and I did a bit of masking too so the kitty would be in front of the pumpkins.
Oh, Hi! It's been a minute or two since my last post, but I had this grand idea to create five cards with one stamp set and of course, a video to go along with it. However, one video would have been almost an hour long, even with all the coloring sped up quite a bit, so instead, I'll be doing a series of 3 blog posts (and videos).
{Supplies used are linked in the text in this post. Compensated affiliate links may be used at no additional cost to you. Thank you for your support!}
Here's the video for the first two cards:
And here is the first card:
To get started, I stamped the frog and pumpkins from the Witch Way is the Candy stamp set onto a piece of scratch paper to get an idea for placement. Once I was happy with that, I created masks for the frog and the pumpkins and used my stamp positioner to stamp the images on a 4" x 5.25" panel of Neenah Solar White card stock using Memento Tuxedo Black ink.
After all the stamping was done, it was time to do some coloring!
Frog - G99, G94, G43 and YG93
Pumpkins - YR27, YR15, YR12
Shading around the small pumpkin - W3, W4
Ground - E43, E42, W4
The striped paper is from the Black and White Basics paper pack from My Favorite Things. But, I decided that I wanted it to be black and orange instead of black and white, so I used my Carved Pumpkin Distress Oxide ink and mini ink blending tool to change the color.
I adhered that on top of the stamped panel and trimmed down the excess. I added a strip of black card stock to cover the seam from the patterned paper. Then I mounted that onto a piece of black card stock measuring 4 1/8" x 5 3/8". I adhered that to a top folding white card base and to finish off the card, I stamped the sentiment on a piece of white card stock and attached it with liquid glue. Ta-da! All done!
Next up, Card #2:
I started out by stamping and coloring the witch on a white panel. I decided after I had her all colored that she needed a buddy, so I masked her off and stamped and colored the frog.
Here are the Copics I used:
Hat and Cape - V12, V15, V17
Buckle on the hat - Y08 and Wink of Stella Glitter Pen
Dress, Band on Hat and Tights - YG01, YG03, YG17, YG25
Broom Bristles - Y21, YR23, YR27, E09, E99
Broom Handle - E31, E33, E27
Skin - E21, E00, E0000, R20
Hair - 100, BV23, BV25, BV29
Boots - C1, C3, C5, C7
Frog - G99, G94, G82, G40
Ground - E43, E42
After I was done coloring, I cut the panel down to 2 3/4" x 4" and lightly inked the edges the with black ink.
Once I had it loaded on my digital mat, I resized it to 4.25" 5.5" so it would cover the front of my card. Sent off to my Cricut to be cut from black card stock and Viola! A really cool background!
I used a Ball Point Glue Pen around the edges of the die cut and a few dots of Tombow Multi Mono Liquid Glue in the centers of a few of the spider webs to adhere it to the front of a green top folding card.
I adhered the stamped panel to the front of the card and Ta-da! All done.
Thanks so much for visiting today . . . and check back soon for the second video and the next two cards.