
 |
| {Supplies used are linked in the text in this post. Compensated affiliate links may be used at no additional cost to you. Thank you for your support!} |
Okay. . . so here's the first card:


The kit came with this super cute Cafe Die. To create the card, I inked up a white panel using Tumbled Glass, Salty Ocean and Blueprint Sketch Distress Oxide Ink.
I then placed the die on my inked panel and ran it through my Gemini Junior (which cuts these detailed dies like.a.dream.!). I adhered it to a white panel cut slightly larger than the die, and then adhered that to a top folding A2 sized card.
For the little coffee cup on the sign, I just ran the die through my machine again and cut out one of the cups that is sitting on the table. I used a White Gelly Roll pen to add some steam coming out from the cup. Easy Peasy!
Onto the second card:

I started by stamping the mug in Memento Tuxedo Black ink onto a piece of Neenah Solar White cardstock. I colored that up using Copic Markers: BG02, BG05 and BG09. For the coffee, I used E23, E25, and E27.
Then I stamped the sentiment on the cup in Memento Luxe Wedding Dress ink and heat embossed it with Nuvo Glacier White Embossing Powder.
The next step was to create a mask so I could stamp a bunch of sentiments in the shape of a circle for a background. I did that by using circle die on a piece of regular printer paper. I used temporary adhesive to hold it in place while I stamped the sentiments. You'll see in the video that I arranged all of the sentiments on one acrylic block to make it a bit easier. For the stamping, I used Jumbo Java VersaMagic ink.
After adhering all the pieces to a card, I used foam tape on the mug for some dimension. And there ya go! All done.
Card #3:

The first thing I did for this card was to randomly stamp the sentiment onto a piece of Canson Watercolor card stock. I used Memento Luxe Wedding Dress ink so I could heat emboss it. After that, I used Gathered Twigs Distress Ink to do a watercolor wash over the embossed sentiments.
The coffee cups were also stamped on watercolor card stock, but I used VersaFine Onyx Black ink and heat embossed with Nuvo Clear Embossing Powder. Then I watercolored the saucers using Tumbled Glass Distress Ink, the cups in Broken China Distress Ink, and the coffee in Gathered Twigs Distress Ink.
Once it was nice and dry I stamped the foam in Memento Luxe Wedding Dress ink and used the White Puff Embossing Powder that came with the kit. It doesn't show very well in the picture, but that powder really does get puffy!
I thought that at least one of those cups needed a spoon, so I used my Cricut to cut that out. And there ya have it! Finito.
Ah . . .Card #4. . . Sunflower Cups

I was inspired to put sunflowers on these cups because they reminded me of cups that I actually saw at Pier 1 (at least one hundred years ago). But I loved those cups. I loved the contrast of the cobalt blue and yellow/orange sunflowers.
Anywho. . . to get those sunflowers on those cups, I created a "reverse" mask by stamping the images on a sticky note and I only cut out the inside of the image. (You can see how I did that in the video). Once I placed the mask over my stamped image, I stamped the sunflowers from the Sunny Harvest Stamp Set by Power Poppy right over the mask.
Then I colored them up using Copics. For the mugs, I used B23, B24, B18 and B27. For the Sunflowers, I used YR12, YR14, YR18. For the flower centers I used E23, E25, E27 and E29. I used the same browns except E29 for the coffee in the cups. For the shadow under the cups, I used C1, C3 and C5.
I put it all together, and Viola! All done.
And here's the fifth card. . .

This card was pretty quick and easy. I stamped the to-go cup using Memento Tuxedo Black ink onto patterned paper and cut them out with scissors. Then I stamped the lids onto white cardstock and also cut them out by hand.
To get the "Sending you," I performed a bit of stamp surgery and cut the stamp apart. The full sentiment reads "Sending you a Latte Love". . . but I wanted to send "a cup of joy." Sometimes, surgery is necessary.
So, after the surgery, I stamped "Sending you" onto a fishtail banner that I die cut from patterned paper. The circle is also a die and that sentiment fit on it perfectly! Here's a little tip: stamp first and then die cut. I added little dashes around the edge of the circle using a fine tip black pen.
I adhered the plaid cup with Tombow Mono Multi Glue and the polka dot cup with foam tape. Put it all together and Ta-Da! All done.
Thanks so much for stopping by today!
I then placed the die on my inked panel and ran it through my Gemini Junior (which cuts these detailed dies like.a.dream.!). I adhered it to a white panel cut slightly larger than the die, and then adhered that to a top folding A2 sized card.
For the little coffee cup on the sign, I just ran the die through my machine again and cut out one of the cups that is sitting on the table. I used a White Gelly Roll pen to add some steam coming out from the cup. Easy Peasy!
Onto the second card:

I started by stamping the mug in Memento Tuxedo Black ink onto a piece of Neenah Solar White cardstock. I colored that up using Copic Markers: BG02, BG05 and BG09. For the coffee, I used E23, E25, and E27.
Then I stamped the sentiment on the cup in Memento Luxe Wedding Dress ink and heat embossed it with Nuvo Glacier White Embossing Powder.
The next step was to create a mask so I could stamp a bunch of sentiments in the shape of a circle for a background. I did that by using circle die on a piece of regular printer paper. I used temporary adhesive to hold it in place while I stamped the sentiments. You'll see in the video that I arranged all of the sentiments on one acrylic block to make it a bit easier. For the stamping, I used Jumbo Java VersaMagic ink.
After adhering all the pieces to a card, I used foam tape on the mug for some dimension. And there ya go! All done.
Card #3:

The first thing I did for this card was to randomly stamp the sentiment onto a piece of Canson Watercolor card stock. I used Memento Luxe Wedding Dress ink so I could heat emboss it. After that, I used Gathered Twigs Distress Ink to do a watercolor wash over the embossed sentiments.
The coffee cups were also stamped on watercolor card stock, but I used VersaFine Onyx Black ink and heat embossed with Nuvo Clear Embossing Powder. Then I watercolored the saucers using Tumbled Glass Distress Ink, the cups in Broken China Distress Ink, and the coffee in Gathered Twigs Distress Ink.
Once it was nice and dry I stamped the foam in Memento Luxe Wedding Dress ink and used the White Puff Embossing Powder that came with the kit. It doesn't show very well in the picture, but that powder really does get puffy!
I thought that at least one of those cups needed a spoon, so I used my Cricut to cut that out. And there ya have it! Finito.
Ah . . .Card #4. . . Sunflower Cups

I was inspired to put sunflowers on these cups because they reminded me of cups that I actually saw at Pier 1 (at least one hundred years ago). But I loved those cups. I loved the contrast of the cobalt blue and yellow/orange sunflowers.
Anywho. . . to get those sunflowers on those cups, I created a "reverse" mask by stamping the images on a sticky note and I only cut out the inside of the image. (You can see how I did that in the video). Once I placed the mask over my stamped image, I stamped the sunflowers from the Sunny Harvest Stamp Set by Power Poppy right over the mask.
Then I colored them up using Copics. For the mugs, I used B23, B24, B18 and B27. For the Sunflowers, I used YR12, YR14, YR18. For the flower centers I used E23, E25, E27 and E29. I used the same browns except E29 for the coffee in the cups. For the shadow under the cups, I used C1, C3 and C5.
I put it all together, and Viola! All done.
And here's the fifth card. . .
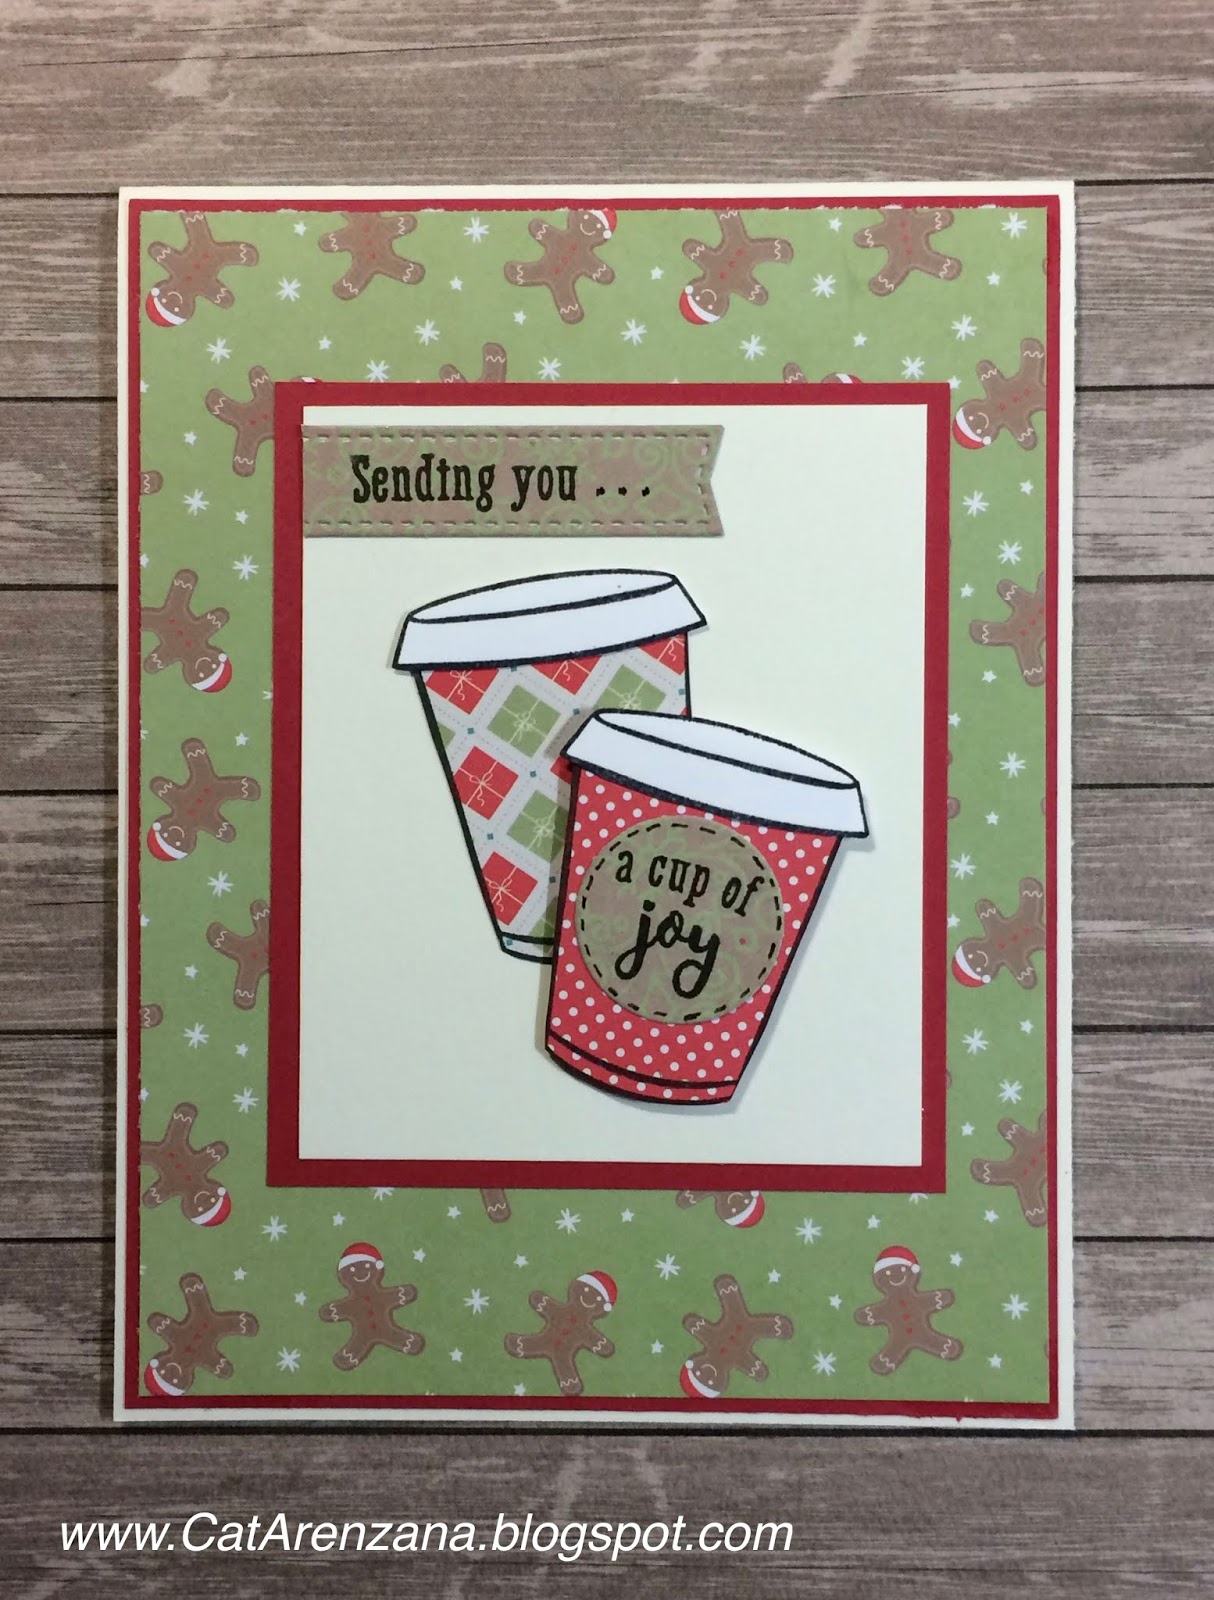
This card was pretty quick and easy. I stamped the to-go cup using Memento Tuxedo Black ink onto patterned paper and cut them out with scissors. Then I stamped the lids onto white cardstock and also cut them out by hand.
To get the "Sending you," I performed a bit of stamp surgery and cut the stamp apart. The full sentiment reads "Sending you a Latte Love". . . but I wanted to send "a cup of joy." Sometimes, surgery is necessary.
So, after the surgery, I stamped "Sending you" onto a fishtail banner that I die cut from patterned paper. The circle is also a die and that sentiment fit on it perfectly! Here's a little tip: stamp first and then die cut. I added little dashes around the edge of the circle using a fine tip black pen.
I adhered the plaid cup with Tombow Mono Multi Glue and the polka dot cup with foam tape. Put it all together and Ta-Da! All done.
Thanks so much for stopping by today!
No comments:
Post a Comment