
Memory Box has another challenge . . .and you know how I love a challenge!
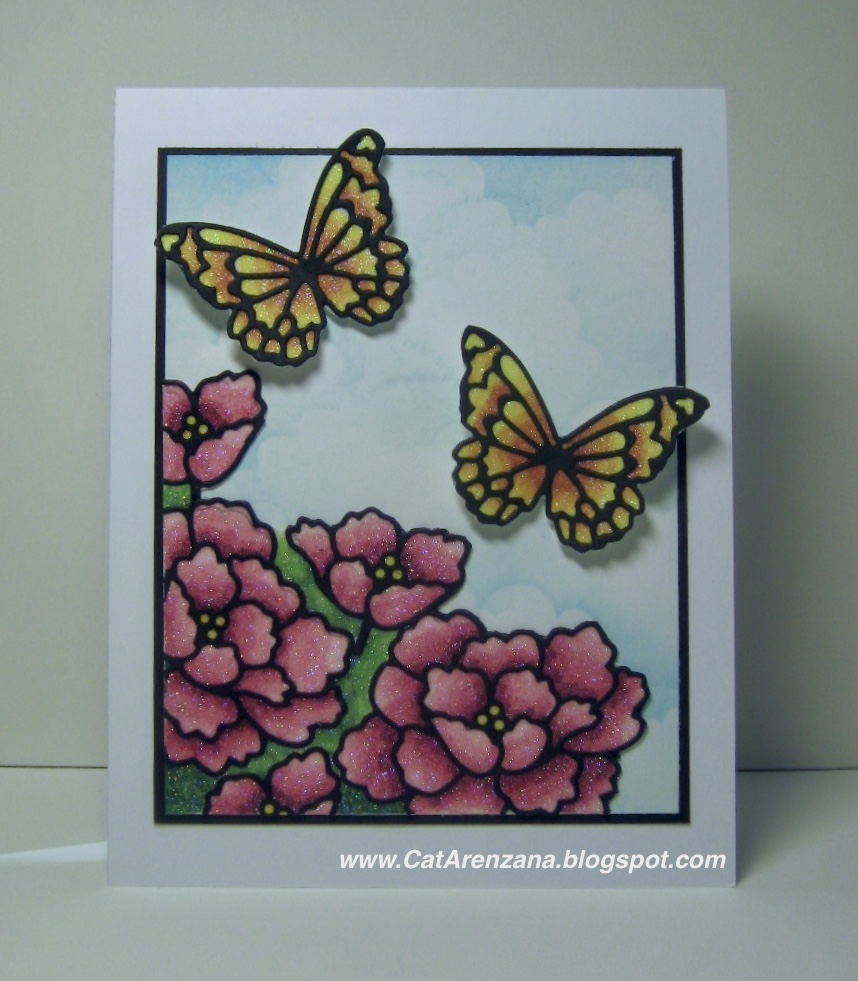
I created this card using the Avezzano Butterflies and the Budding Peony dies . . . or pieces of them, anyway. That's one of the many things I love about Memory Box dies. So many of them can be used as they are, or they can be cut apart into smaller pieces.

There were definitely a few steps involved, but I'm so happy with how it turned out! All that glittery goodness!

These are the markers I used:

This particular technique is one that I've taught many times and these dies . . . with the fine lines and all the detail . . . oh, how my heart fluttered! I knew they would be perfect for all this glittery goodness.
I know, I know . . . a video would be so much better for a tutorial, but I'm not set up for that (yet).
And, truthfully, I was just going to post the card without a tutorial, but changed my mind, because someone out there might like to learn how I did this.
So, here it goes.
Supply List:
- Detailed die(s) like those that I used from Memory Box
- Clear Double Sided Adhesive by Elizabeth Craft Designs
- Cool Diamond Silk Microfine Glitter by Elizabeth Craft Designs (yes, the glitter makes all the difference. I've tried this technique with other glitters and they just don't work as well)
- Various colors of Copic Markers (I've only ever done this technique with Copics. I don't know if other markers will work.)
- Scraps of White card stock

Step 1:
Die cut the small butterfly twice and the peony three times.

Step 2:
Trim the frame away from the butterflies and cut apart the peonies. I also trimmed around the top of the butterfly wings.

Step 3:
Apply Transparent Double Sided Adhesive to a piece of white cardstock.

Remove backing to expose adhesive on the front of cardstock and set the backing aside; you'll need that in a minute.
Step 4:
Place the butterflies on top of the exposed adhesive.

Step 5:
Place the backing on top of the butterflies and rub over them really well to make sure they are stuck to the adhesive.
 |
| You can kind of see the butterflies under the brown release paper |
Step 6:
Remove the release paper and pour glitter over the butterflies.
 |
| I have a tray that I use for glittery projects. There is a sheet of fabric softener in the bottom of the tray to help reduce static. The coffee filter creates a catch so it's easy to pour left over glitter back in to the jar and also helps reduce static. |
Step 7:
Using your finger, "burnish" the glitter by rubbing in a circular motion over the entire surface. The goal is to keep burnishing until you no longer feel any stickiness from the adhesive. Shake off the excess glitter and then use a soft brush to get rid of the remaining glitter bits.
Step 8:
Time to add color! But before we start, this is very important: do not color in a back and forth or circular motion; this will cause the glitter to start moving around. You literally want to dab the tip of the marker to the surface.


And there ya have it. . . your butterflies are all colored!
Moving on to the peonies . . . the steps are pretty much the same, but here's how I figured out the layout and whatnot.
I positioned the peonies on a piece of white card stock and then used Scotch Removable Tape to hold them in place.


Next, I lightly traced with a pencil around the blooms so I would know where to place them after I put the adhesive on the card stock. I left the removable tape on the blooms to make it easier to put them back into place.

After I put the adhesive on the card stock and repositioned the peonies, I gently pressed the peonies so they would stick, but was careful not to press too hard on the removable tape, because, well . . . I wanted it to be removable and that Elizabeth Craft adhesive is super sticky.
Once I peeled off the removable tape, I put the release paper over the blooms and rubbed them really well into the adhesive, like I did in Step 5 for the butterflies.
Then, it was just a matter of repeating Steps 6, 7, and 8.
And, here's how I colored the peonies:


To finish up the card, I stenciled clouds using Tumbled Glass Distress Ink onto a piece of 3.5" x 4.5" white card stock. Then, I fussy cut the butterflies and fussy cut around the peonies. I adhered the peonies using my ATG and used foam tape to adhere the butterflies.
I adhered that panel to a piece of 3 5/8" x 4 5/8" black card stock and then adhered it to my card base. Here's the completed card one more time.
Thanks for stopping by today . . . and if you decide to try this technique, please share your creations. I would love to see them! And, of course, if you have any questions, please feel free to contact me; I'd be happy to help you!
No comments:
Post a Comment